 |
| Click on the image and print from your browser |
November Block Photo Tutorial
The letters in parenthesis are the fabrics I used following the directions above.
 |
| Choose four fabrics. From left to right: green (fabric C), red (fabric D), tan (fabric A), poinsettia (fabric B). |
Making the Half-square Triangle Units
We are using Method 2 (found in the Half-Square Triangle Tutorial post) to make the half-square triangles.
 |
| Sew a scant 1/4" seam all around the outside edge of the two pieces of fabric (that are still stacked right sides together). |
 |
| Cut from corner to corner twice to end up with four half-square triangles. |
 |
| Press open towards the dark side. |
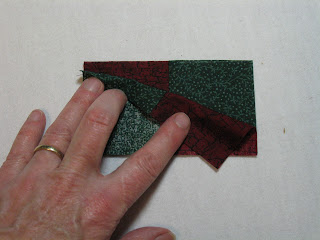
Method 1 in the Half-Square Triangle Tutorial), the patches would have had the stripes going in different directions. That can be kinda annoying for some people!
Sewing the Four-Patch Units
You should already have your strips sewn from the last post on strip piecing. If not, click here.
Take two pieces of the two-patch strip, line them up so that the colors are opposite (see photo) and the center seams nest together.
|
Not sure about nesting seams? Click here and visit this page at Creative Collaborations blog or view a YouTube video linked at the bottom of this post.
Pin where the center seams match, and at the edges.
Sew a scant 1/4" seam. |
I chain piece mine together, you can see the little bit of thread connecting the four-patches.
|
Need a refresher on chain sewing? Visit this post and view the last video.
Press the four-patches open. You should have (5) four-patch units.
|
Trim the four-patch unit to 4 1/2". If your seams are accurate and your cutting is accurate, you probably won't have to trim. I had to trim a little on 4 of the 5 blocks.
Putting the Block Together
this post to learn how to make your own design/press board.
 |
| Press towards the half-square triangles (or towards the four-patchs, but be consistent). |
 |
| Sew the right column of units onto the center column of units. Press towards the half-square triangles (or the four-patches, but it should be towards the same unit as you did in the previous photo). |
I like to 'twirl' the seams open. You have to clip the little thread and open the seam slightly in order to press it like that. You will notice tiny four-patch looking area where four units meet.
 |
| A final press from the front and you are all done! |
 |
| This is Jacob's Ladder from AZ Patch's 2009 March Block of the Month |
If you want your star to really stand out in the quilt block, cut (1) 4 1/2" square of your B fabric or one of your C or D fabrics instead of using a four-patch unit for the center of the block. Then the name of the block changes to Friendship Star Variation. You can see it here.
 |
| Friendship Star Variation |
Abracadabra Quilting Tips and Tricks: Nesting Seams


No comments:
Post a Comment
I've been spammed like crazy lately! Please take an extra few seconds for the word verification if you are a real person and would like to comment. So sorry for the inconvenience.