 |
| North Star 8" finished |
Step 1: Cutting the Fabric
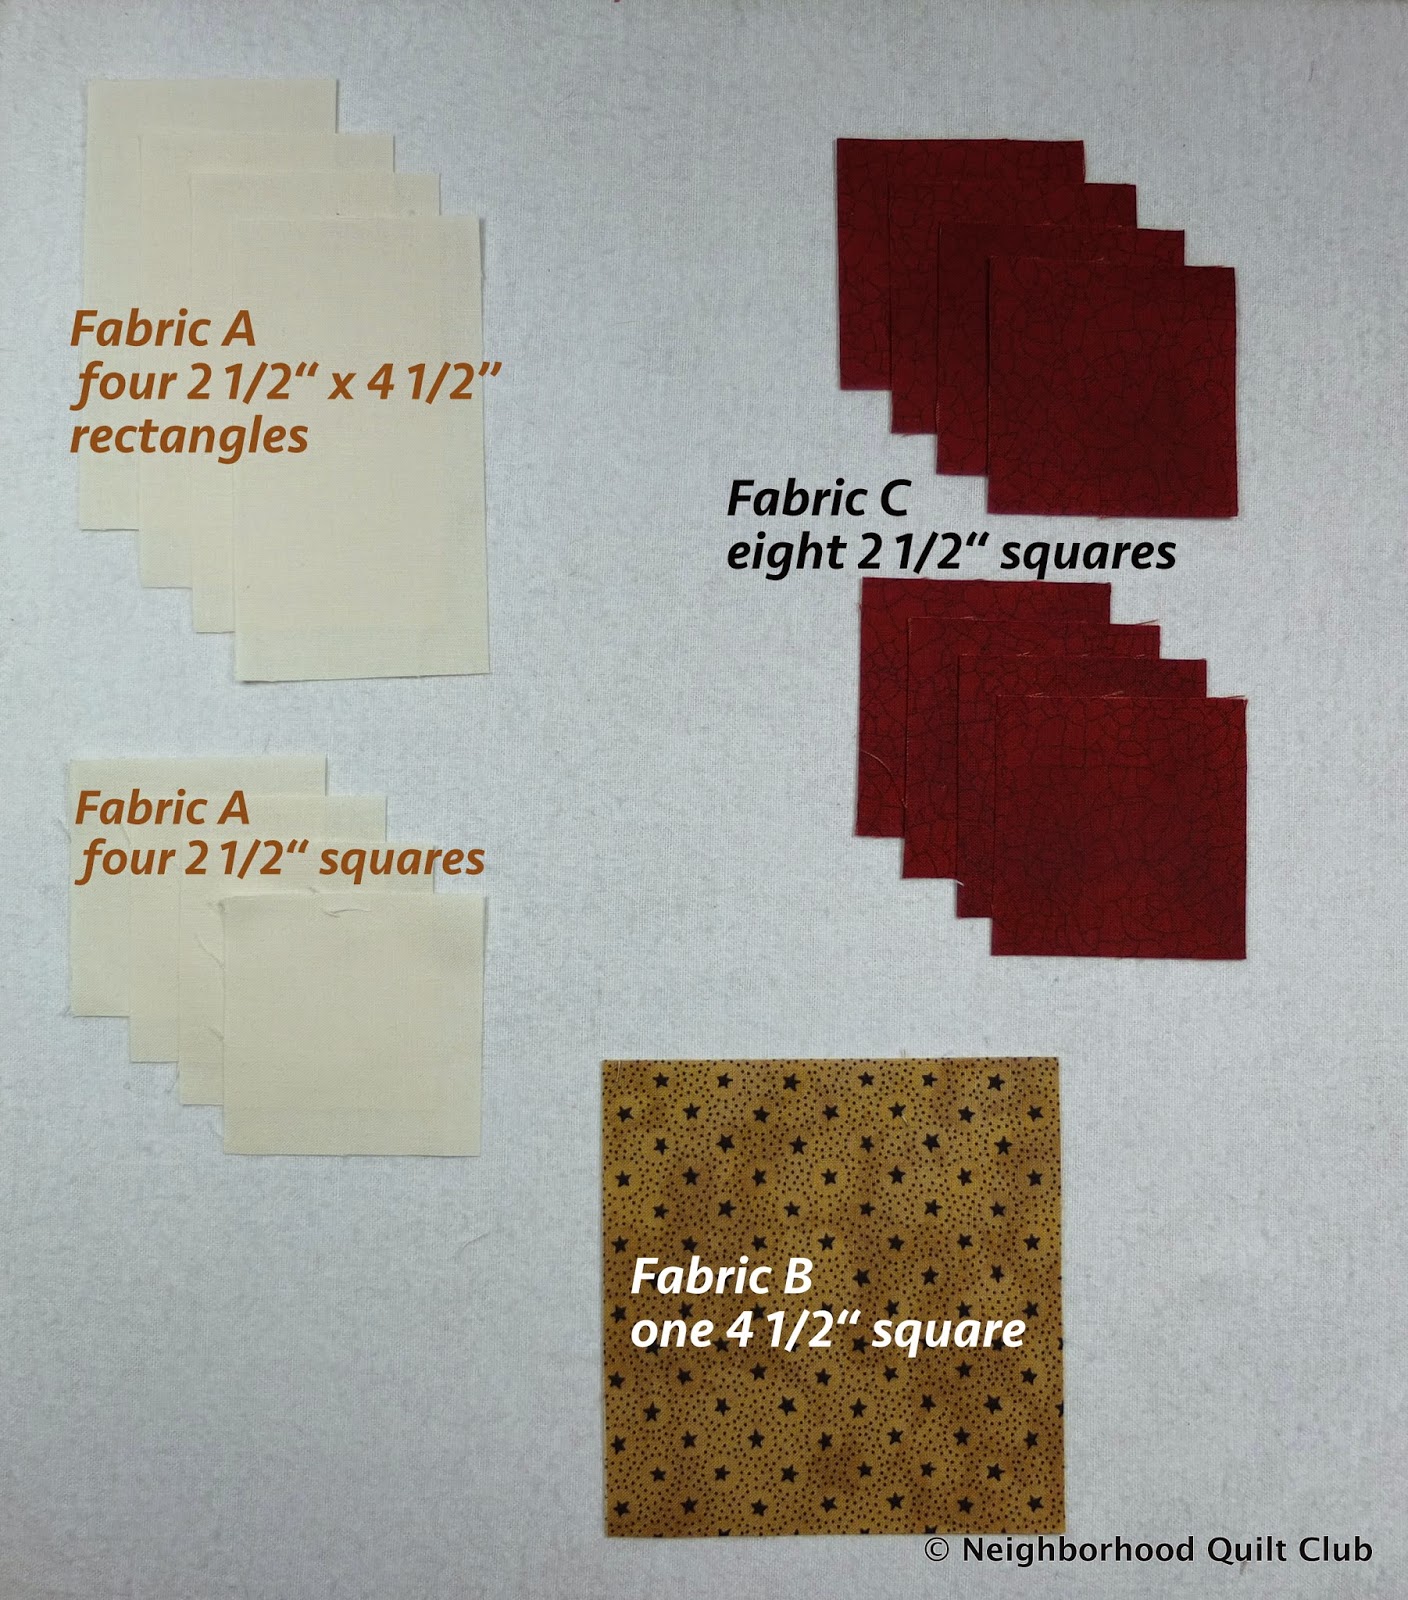
Fabric A: background fabric
Use a fabric scrap that is about 6" x 16"
- A1 - cut four 2 1/2" squares
- A2 - cut four 2 1/2" x 4 1/2" rectangles
- cut one 4 1/2" square
use a scrap that is about 8" x 11"
- cut eight 2 1/2" squares
Step 2: Sewing the Flying Geese Units
Remember that pinning is important to keep the pieces from shifting. We'll be making these Flying Geese using the Sew, Trim, and Flip method.
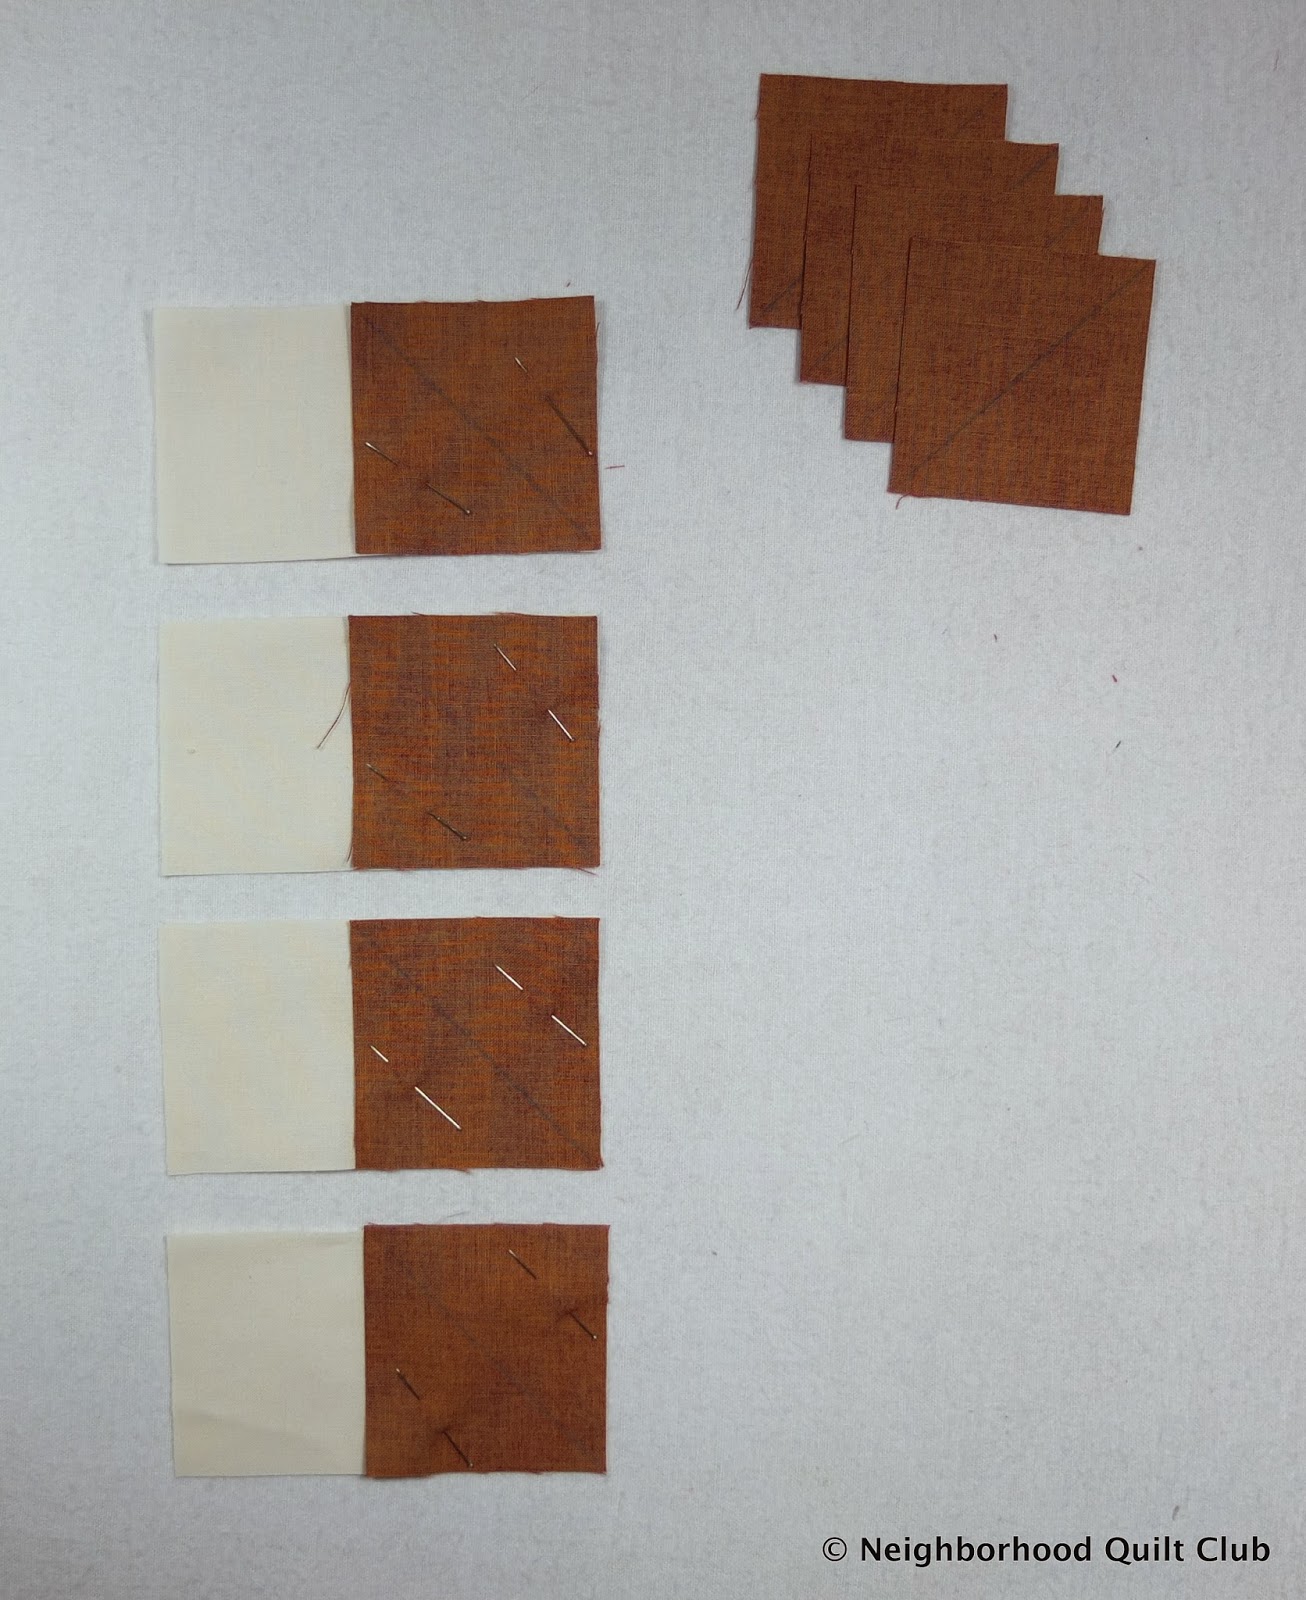 |
| Draw a diagonal line on the back of each Fabric C square. Pin one C to the end of each A1 rectangle with the diagonal line placed as shown in the photo above. |
 |
| Sew just slightly (about 1 thread's width) on the outside of the line. Trim off the corner triangle. Press C (the triangle piece) open. |
 |
| Pin the other four C squares on the other side of the A2 rectangles. Make sure your diagonal line is going from the top center to the bottom left of A2. |
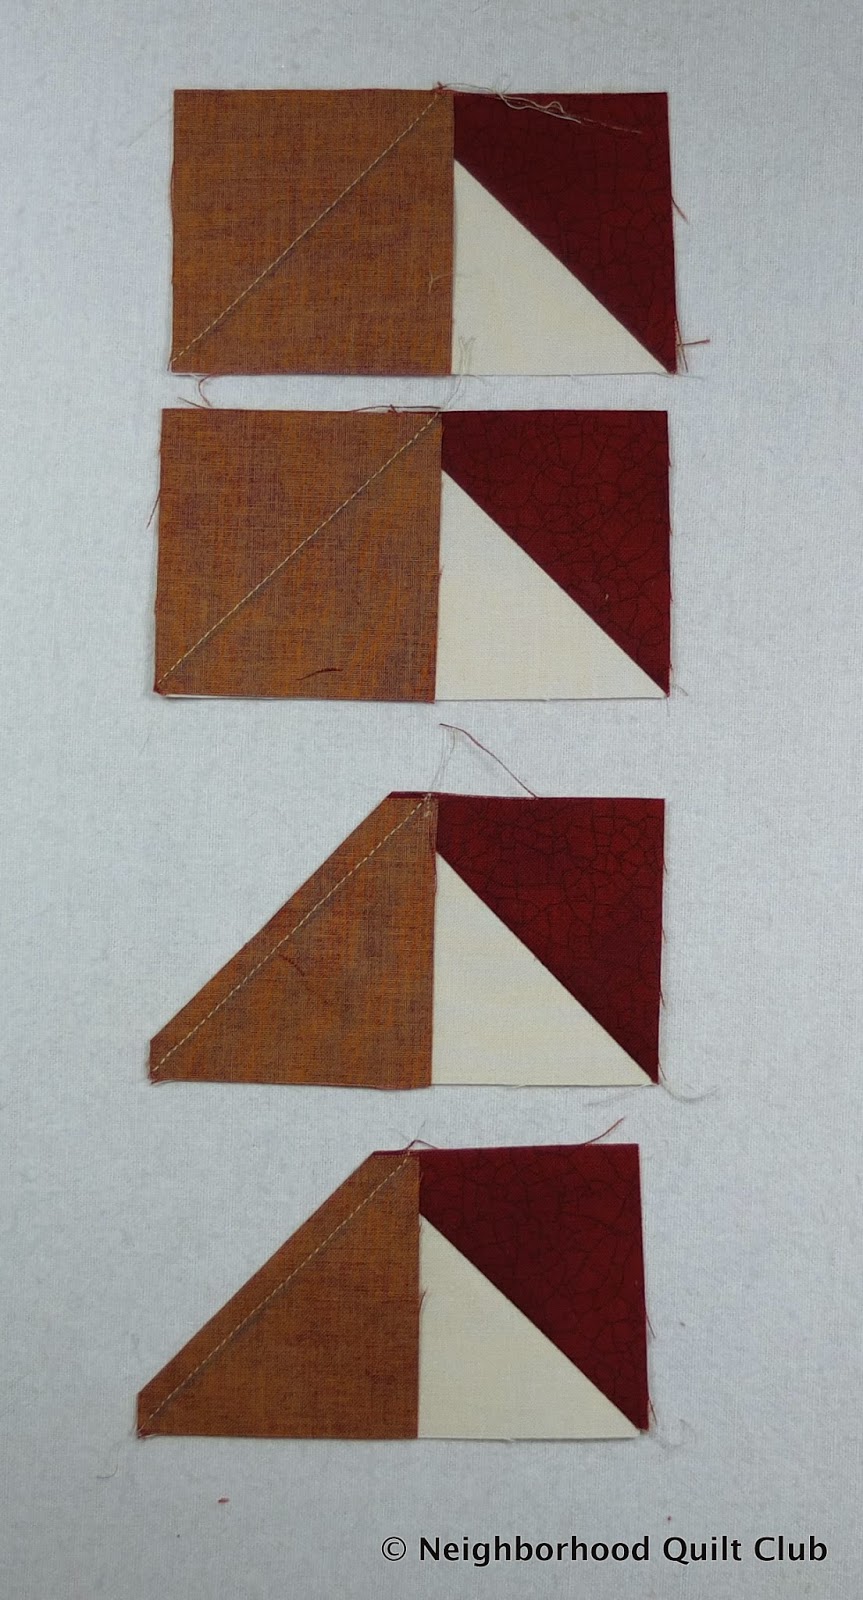 |
| Sew slightly (about one thread's width) on the outside of the diagonal line. Trim off the triangle, press open. Trim to 4 1/2" x 2 1/2" if your Flying Geese units aren't that size. You now have four Flying Geese units. |
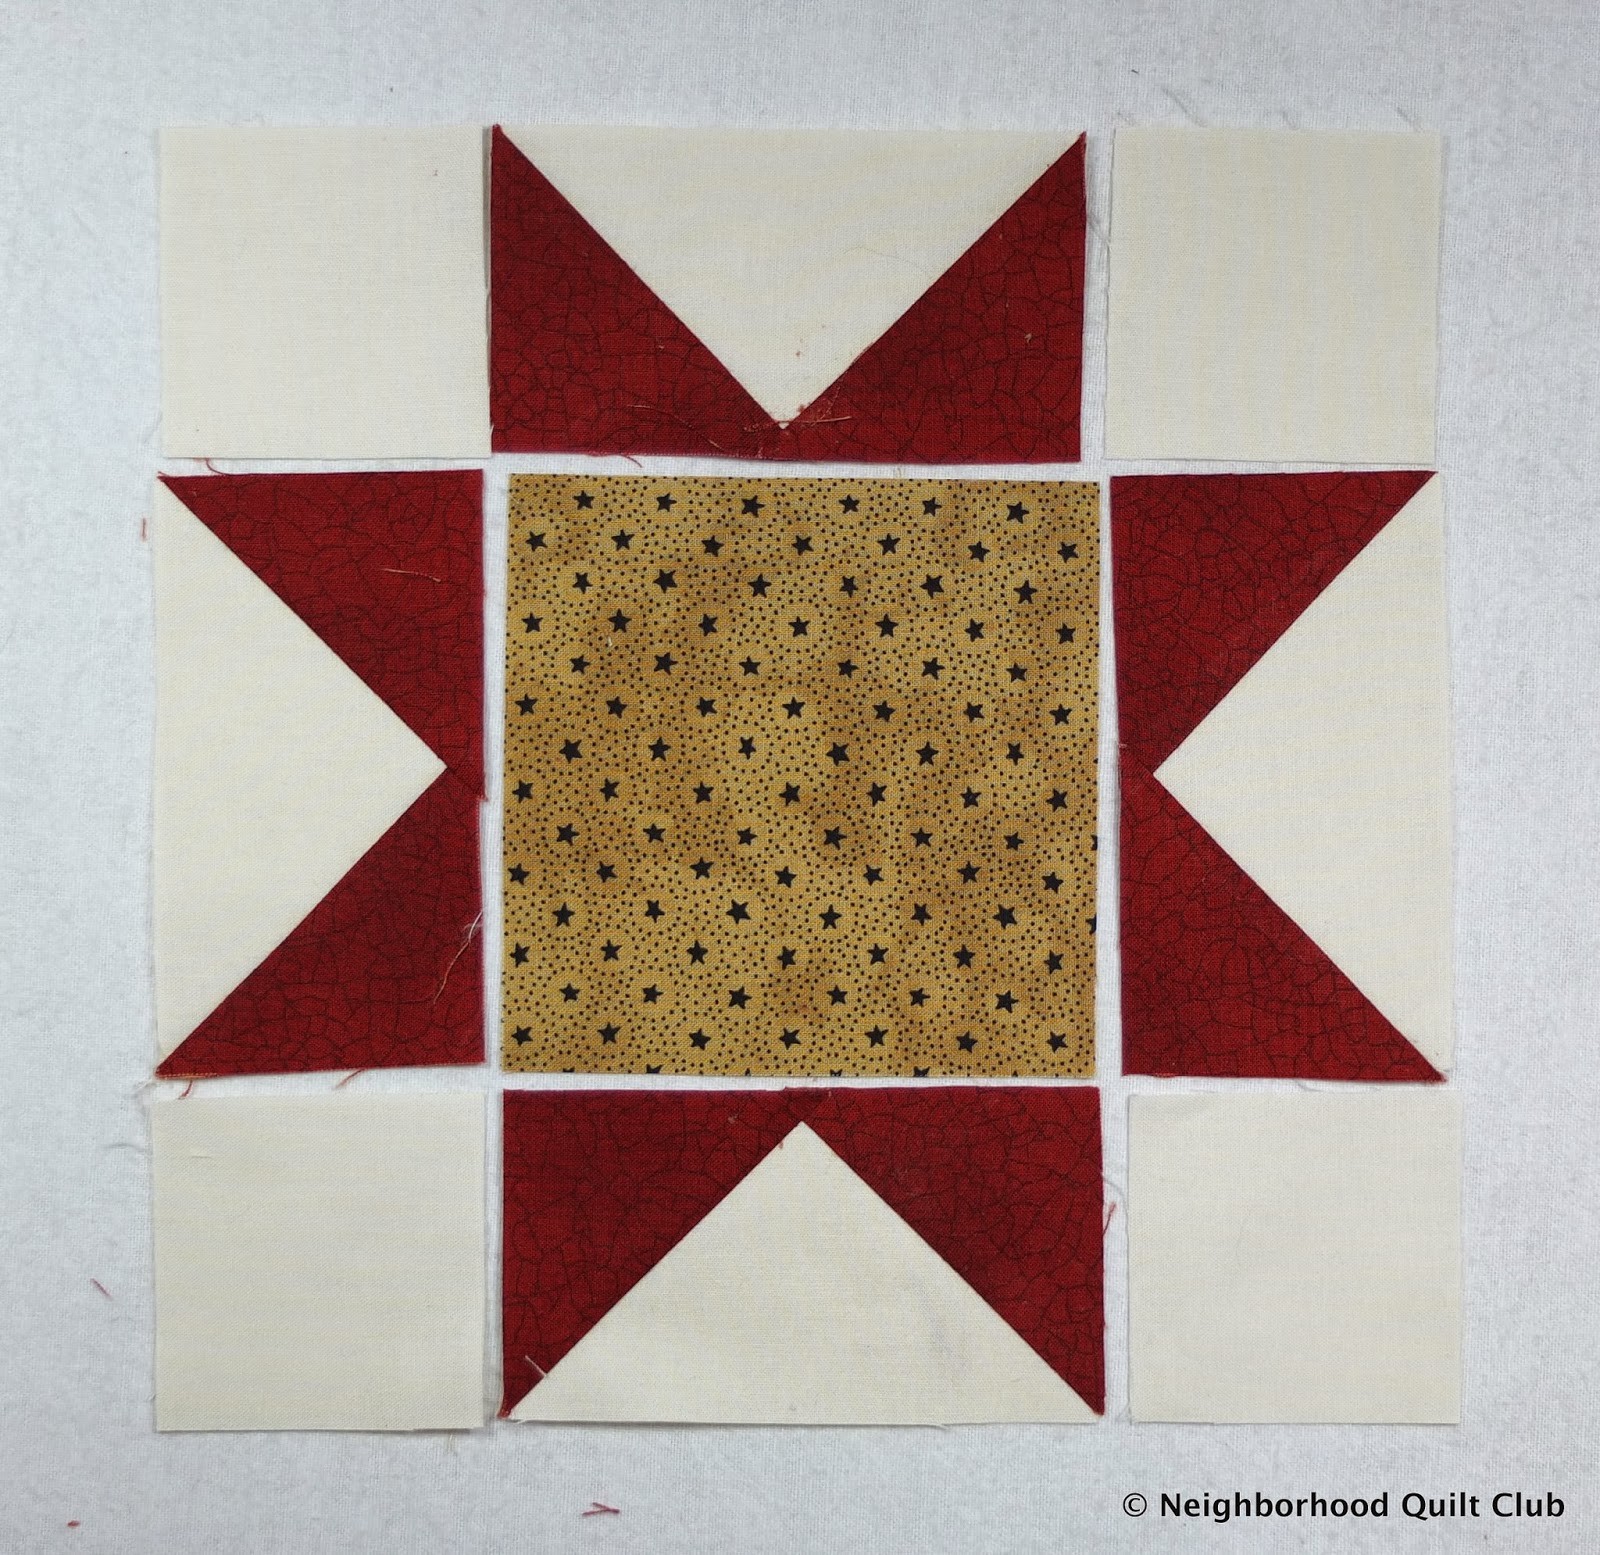 |
| Lay your block out according to the picture above. Use a cutting mat, a Design and Pressing Board, or anything that you can use to bring your block to your sewing machine. |
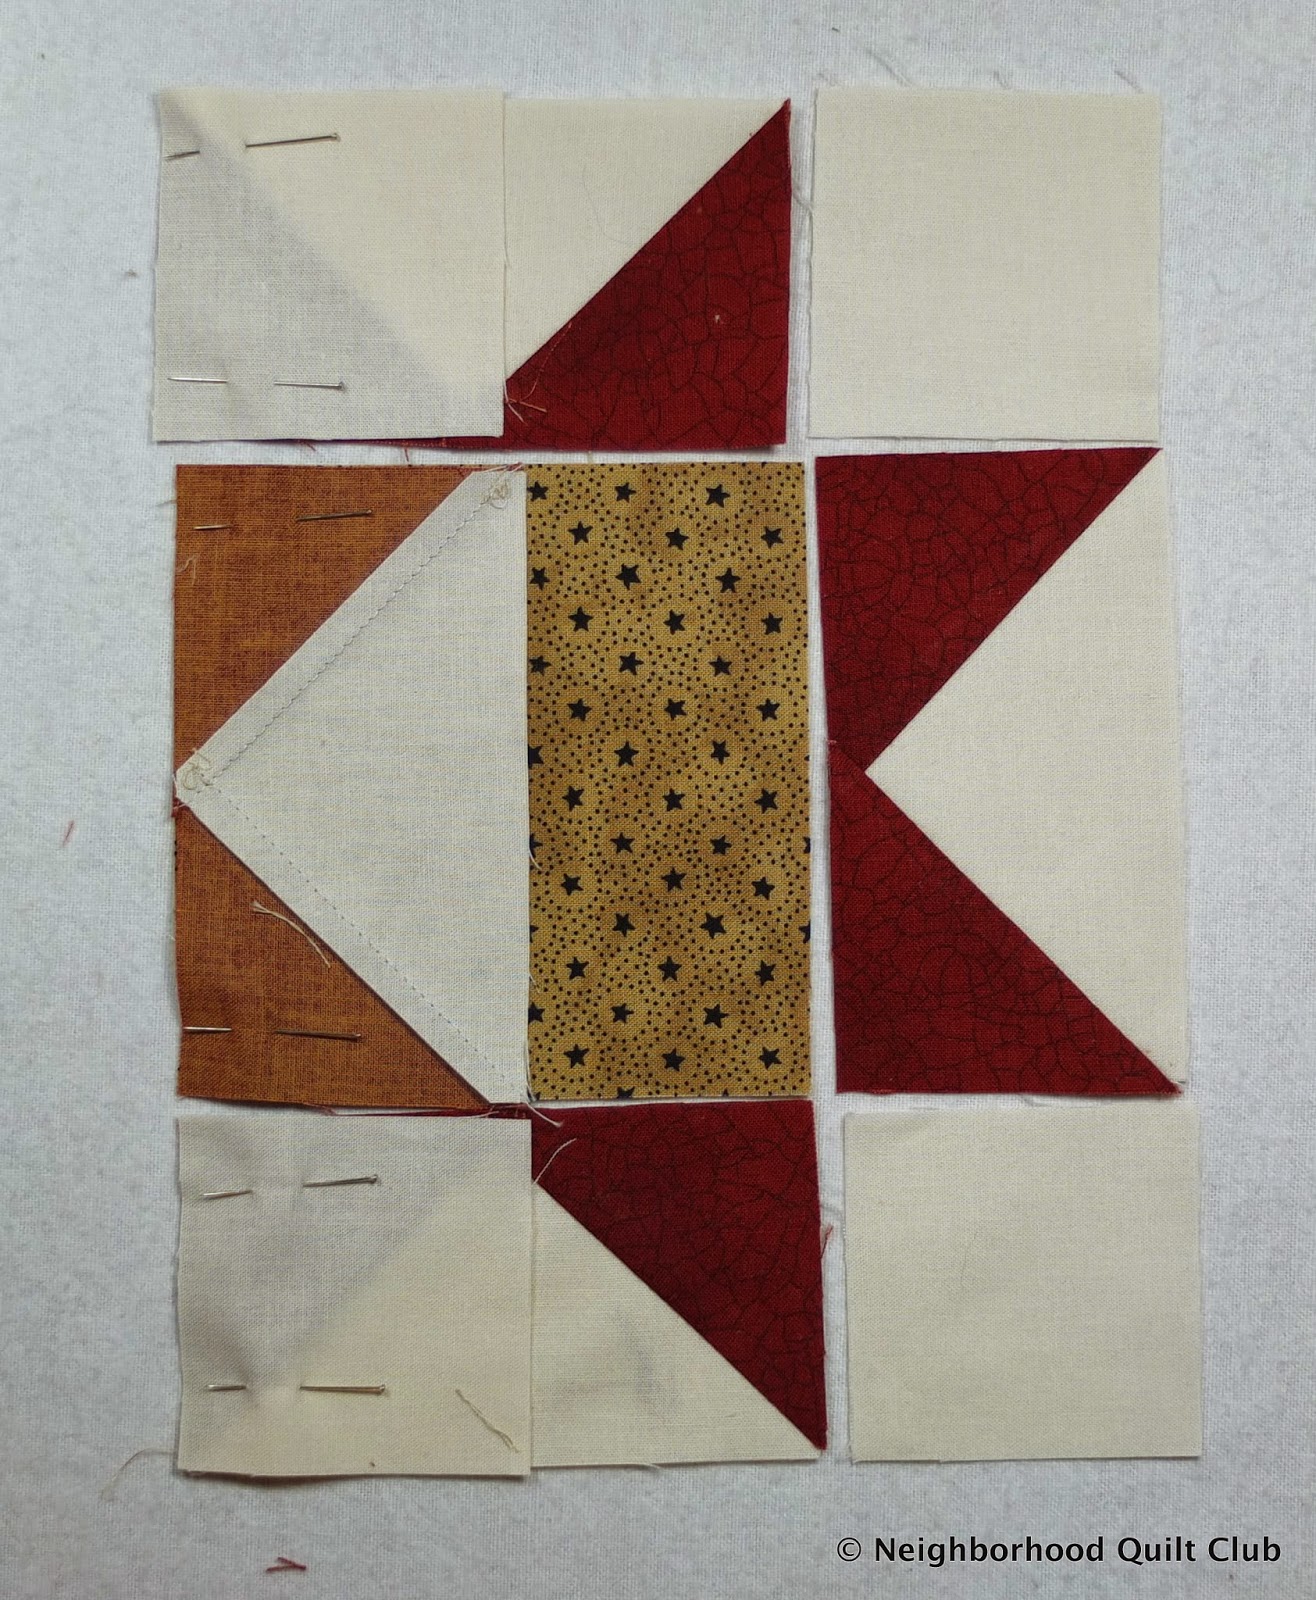 | |
| I sewed the columns first. Lay the outside column (Flying Geese unit and A1), pin blocks in place, sew. Match the top cut edges and the bottom cut edges. If the pieces aren't exactly the same height, sew with the bigger piece towards the feed dogs and the shorter piece on top near the presser foot. The feed dogs will ease the larger piece to fit the smaller piece. Chain sew the pieces together and do not trim the threads between the pieces. This will keep the pieces in the right order as you sew the next few steps. |
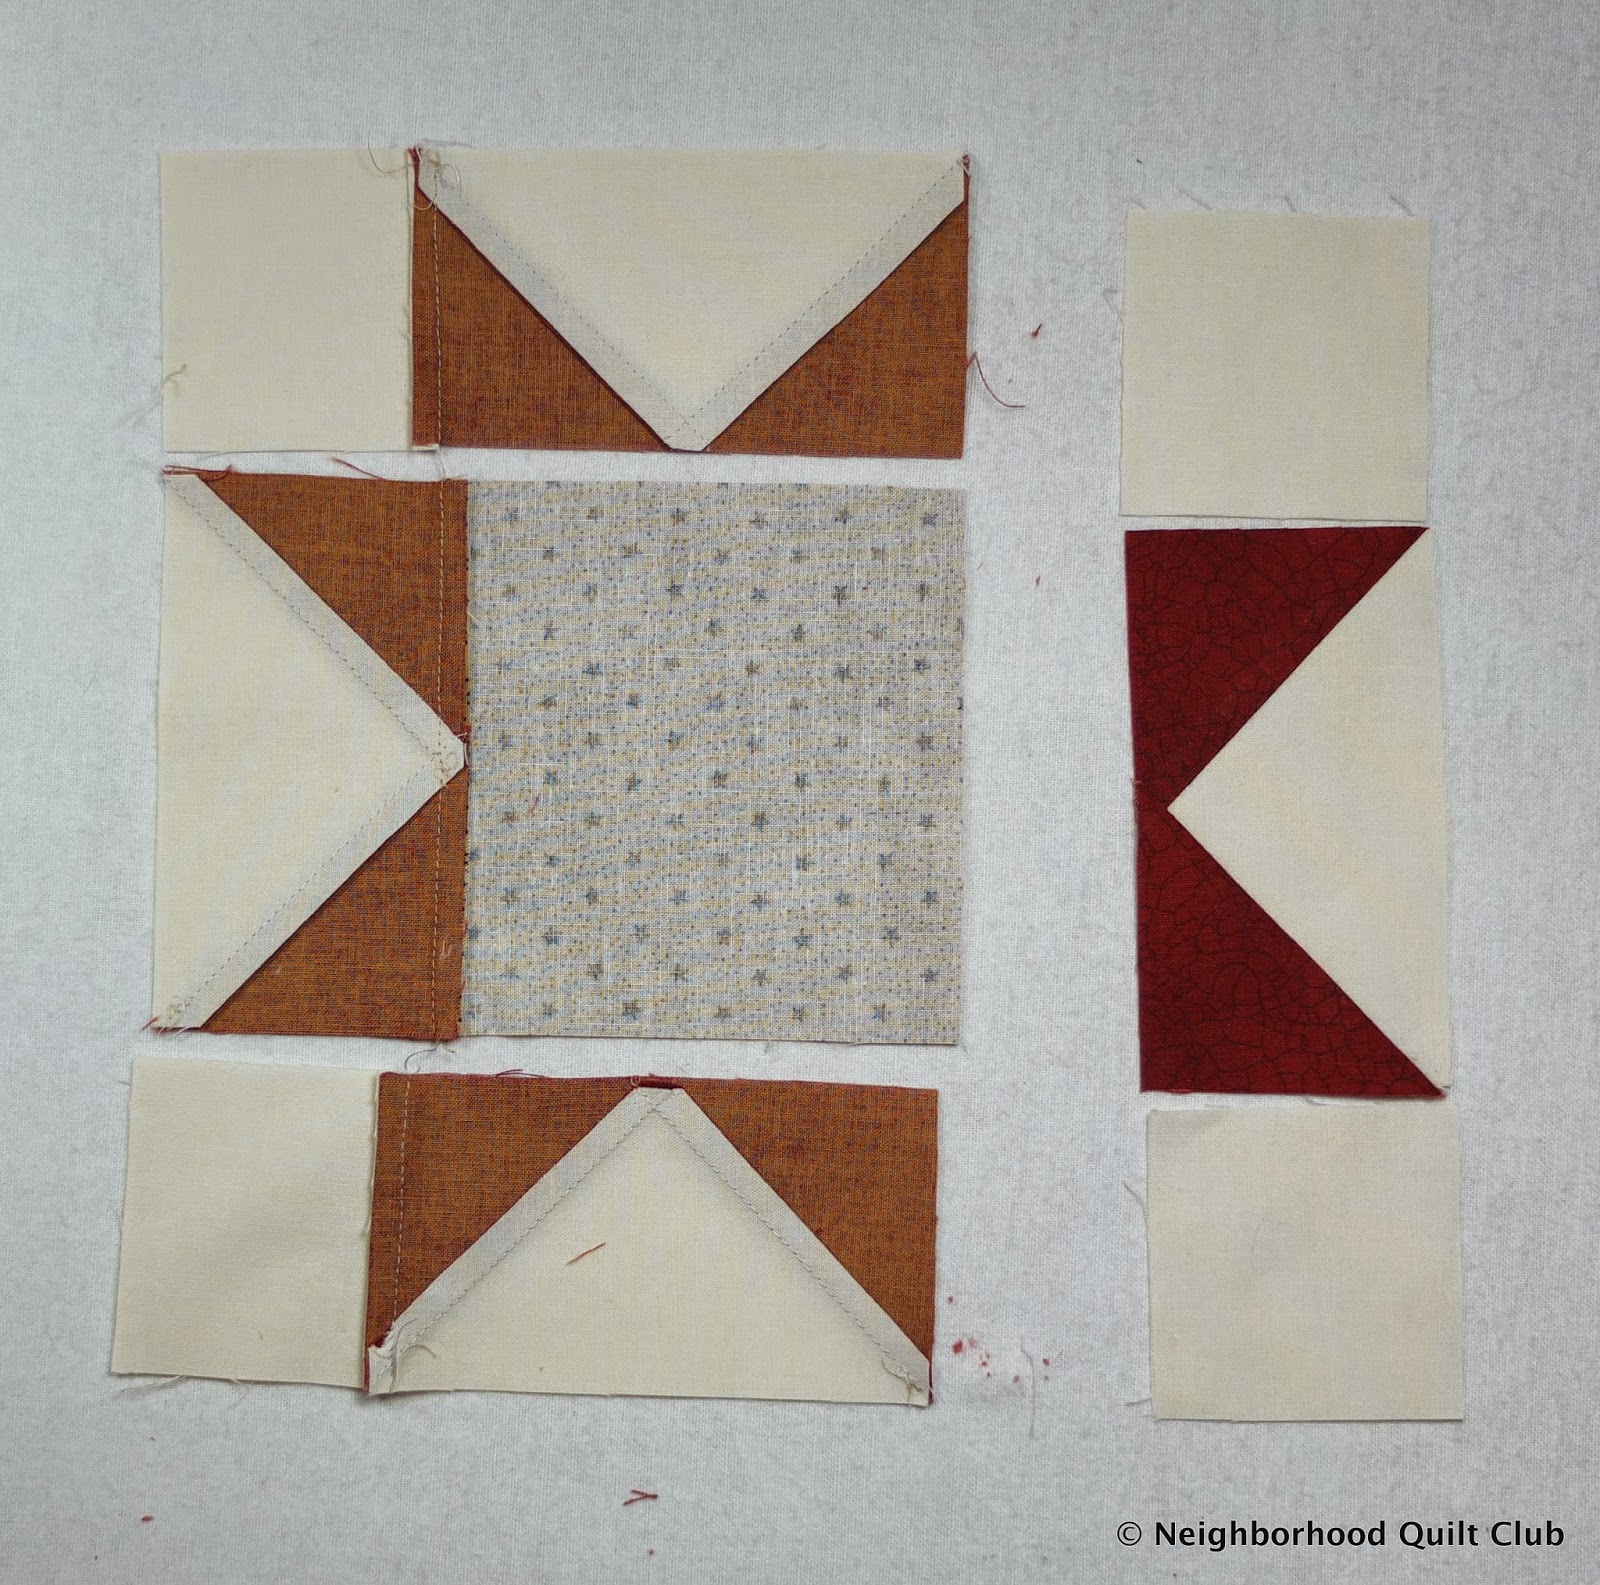 |
| Press the seams towards the least bulk. The top and bottom sections will be pressed towards A1, the center section will be pressed towards B. |
 |
| Repeat for the other column of pieces. |
 |
| Press as before, towards the least bulk. |
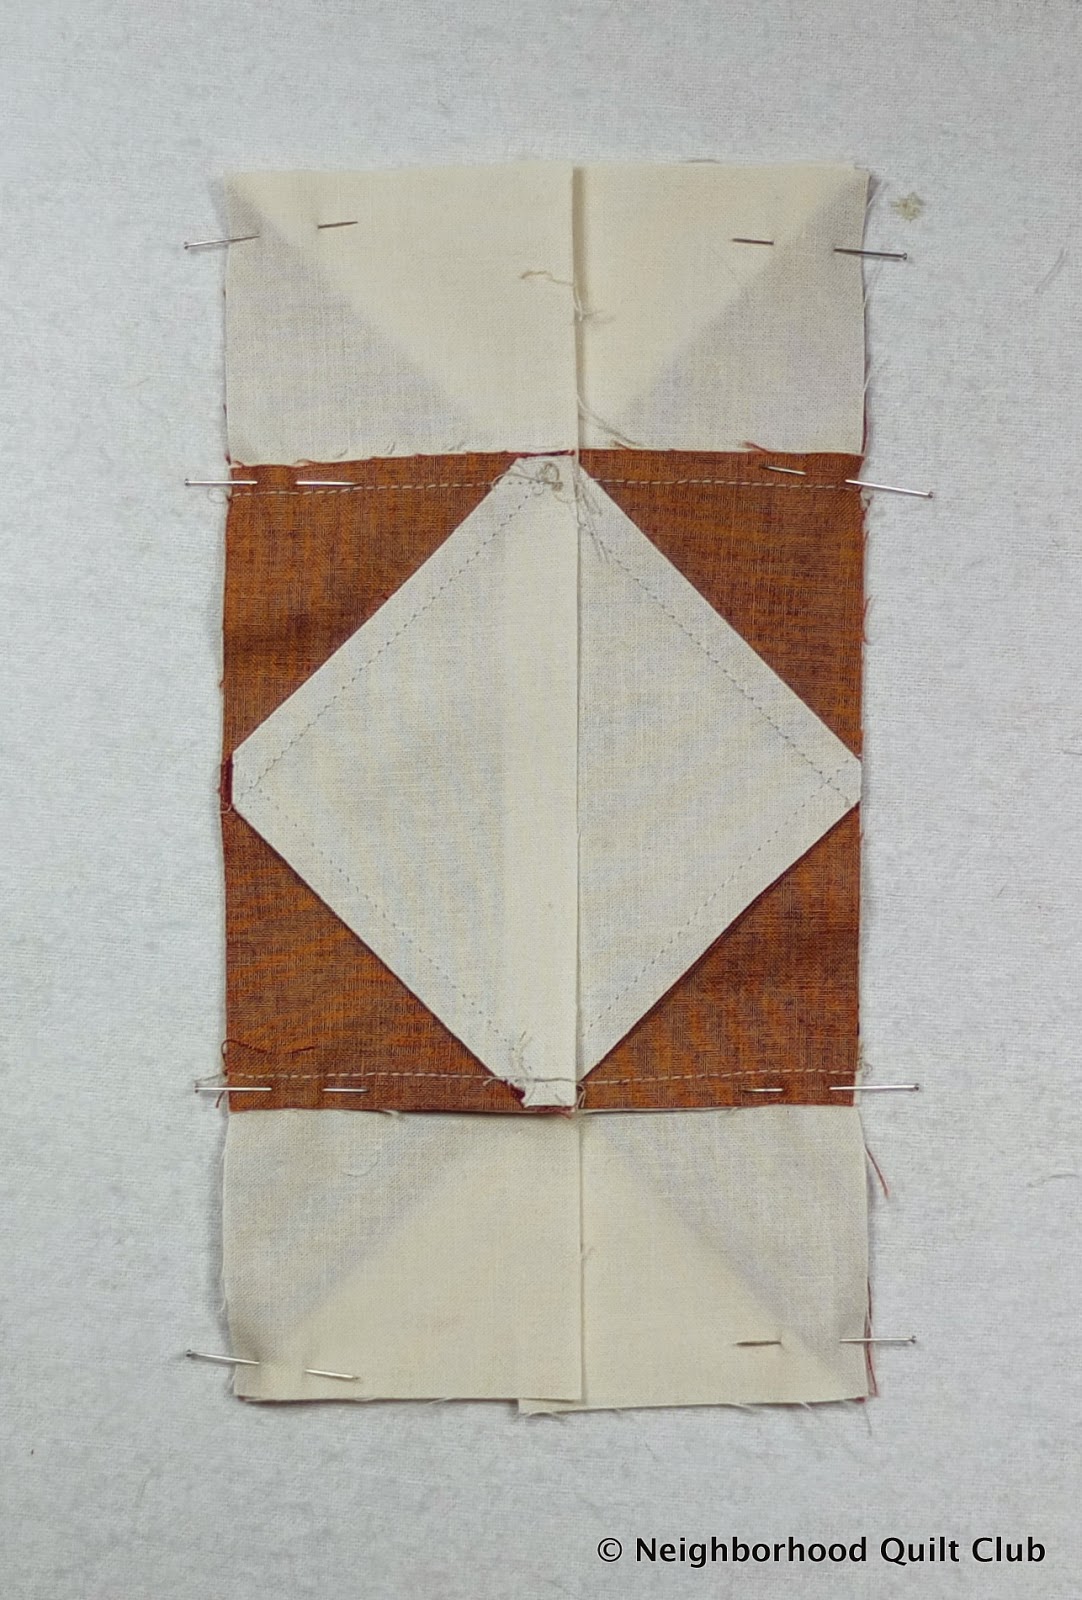 |
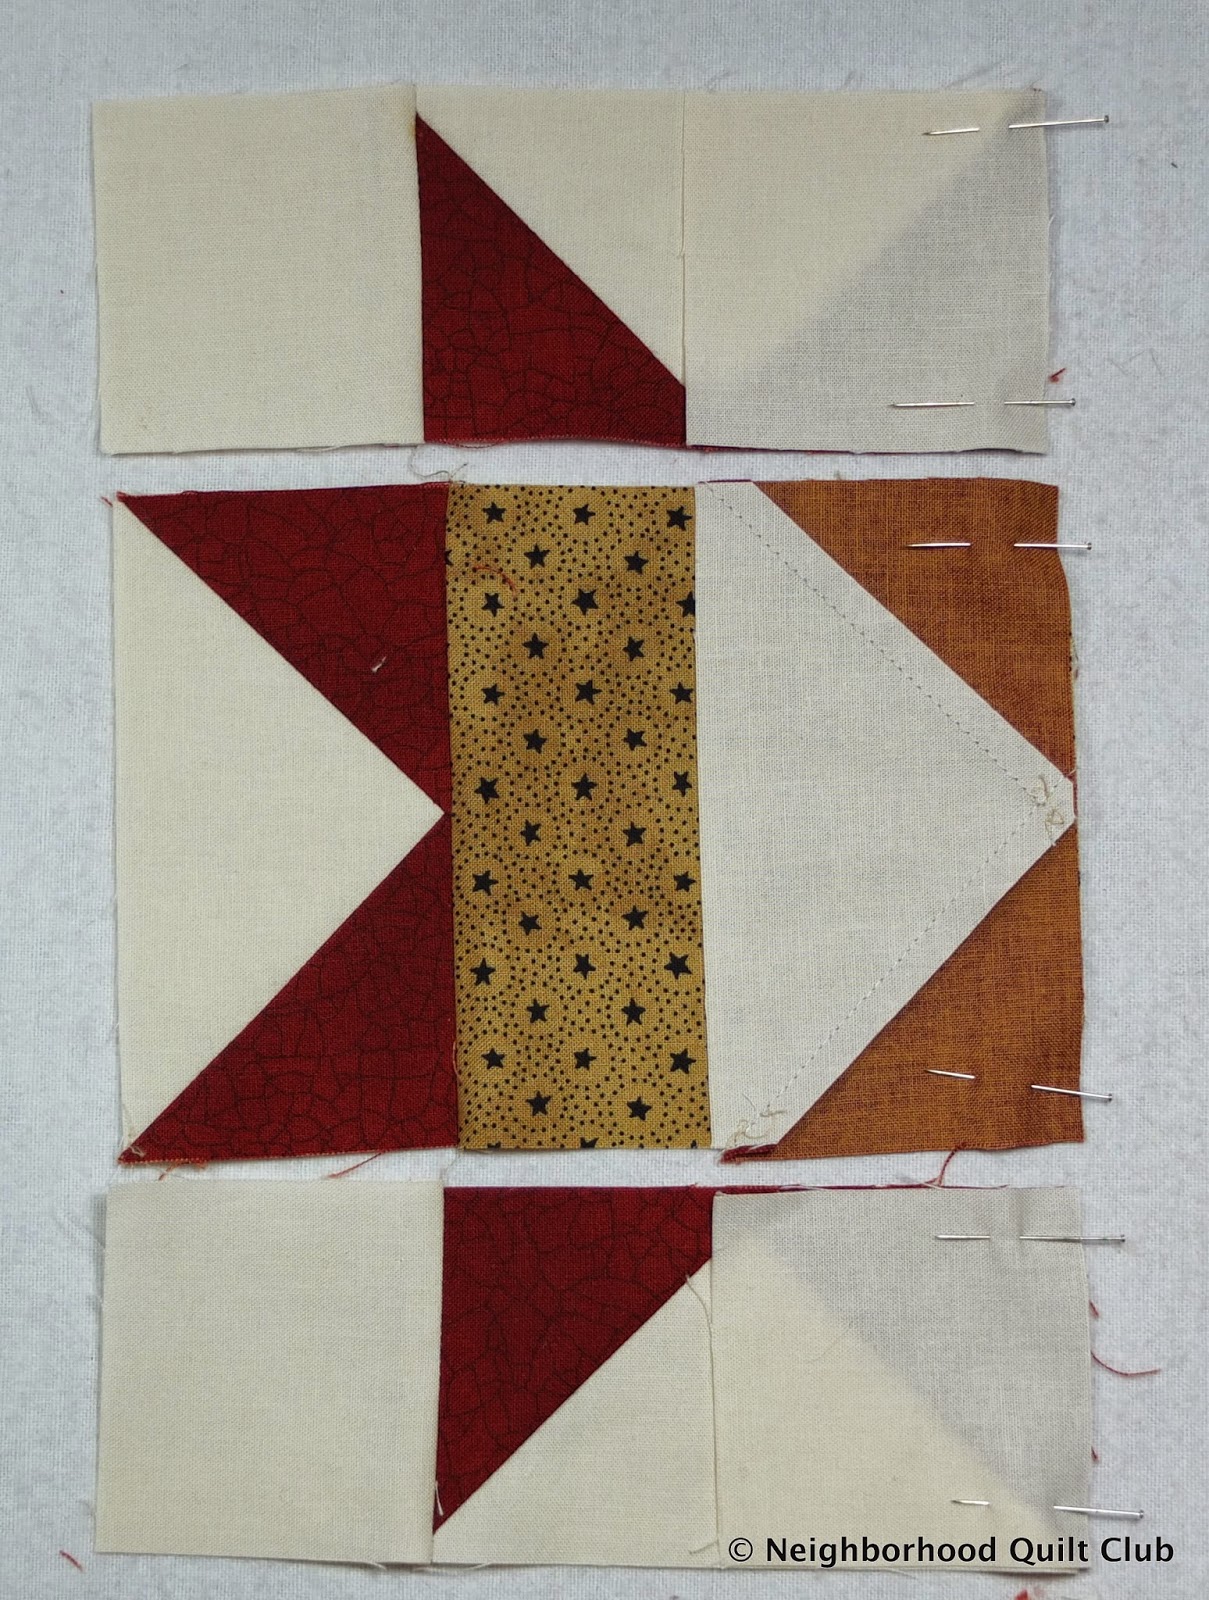
| I've rotated the block in this photo because it's easier to pin and sew in this direction. Place the sewn columns right side together, matching and nesting the seams. Pin at the seams, and the top and bottom of each row. |
 |
| Sew down each side removing pins as you get to them. |
 |
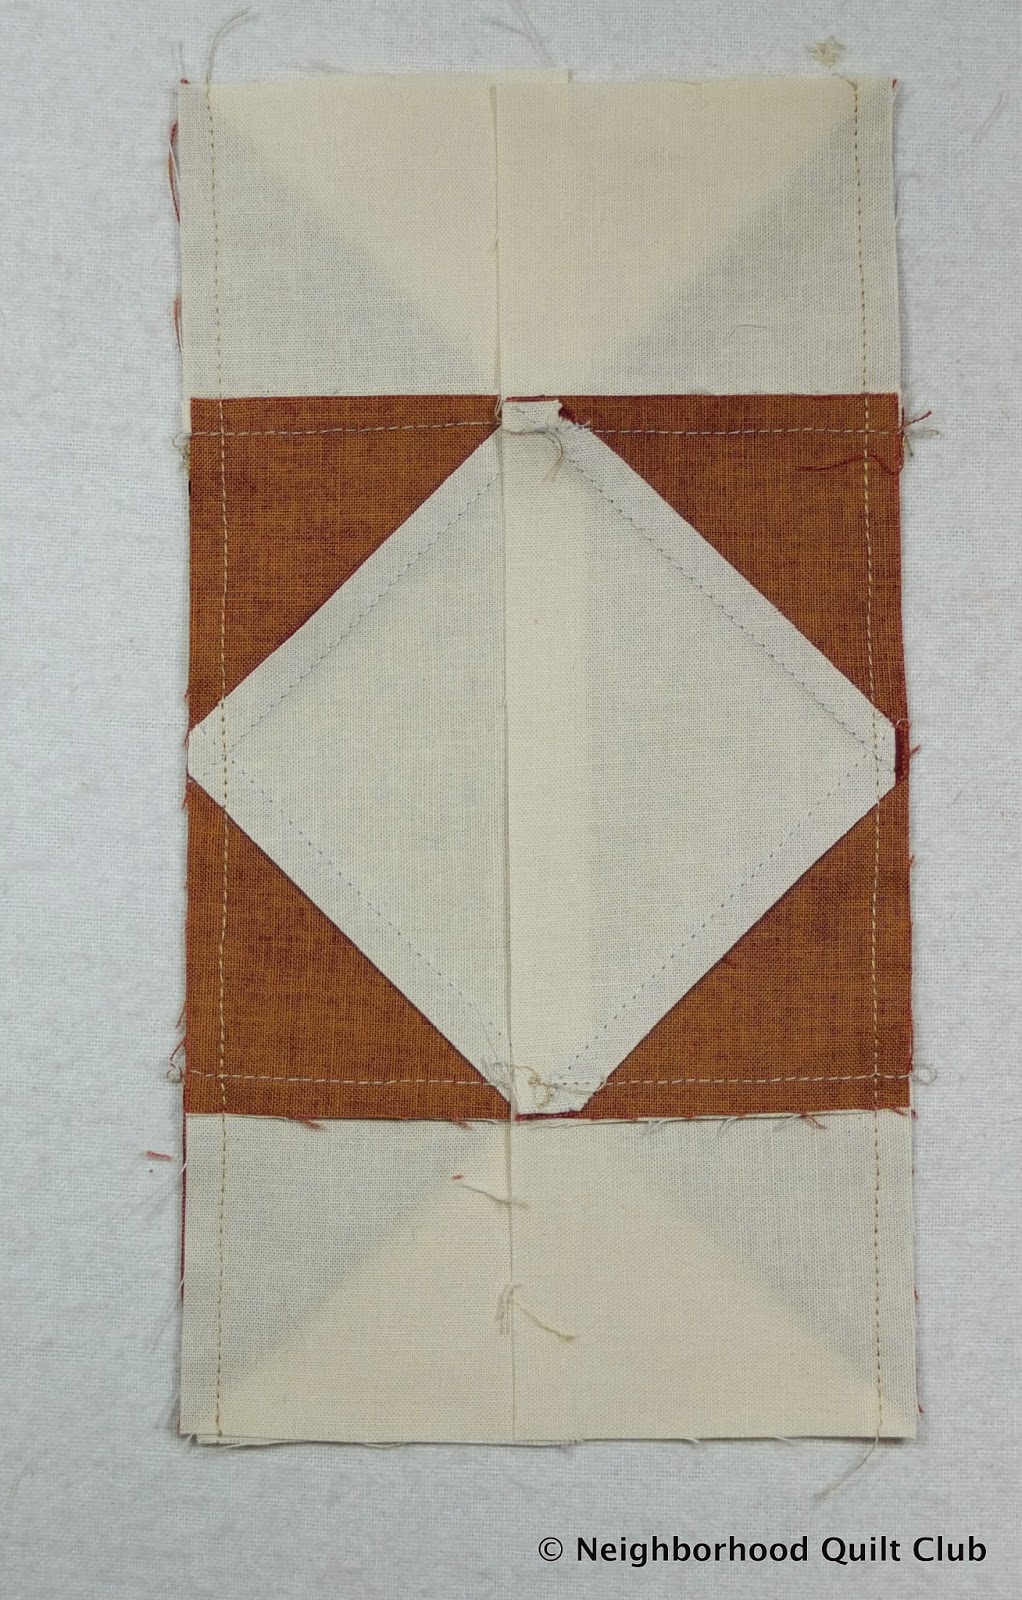
| As you sew down the side seams try to sew the new seam so that it crosses exactly over the crossed seam on the Flying Geese units. See the red arrows. If you sew your seam so that it crosses exactly over the middle, your points will turn out beautifully! |
 |
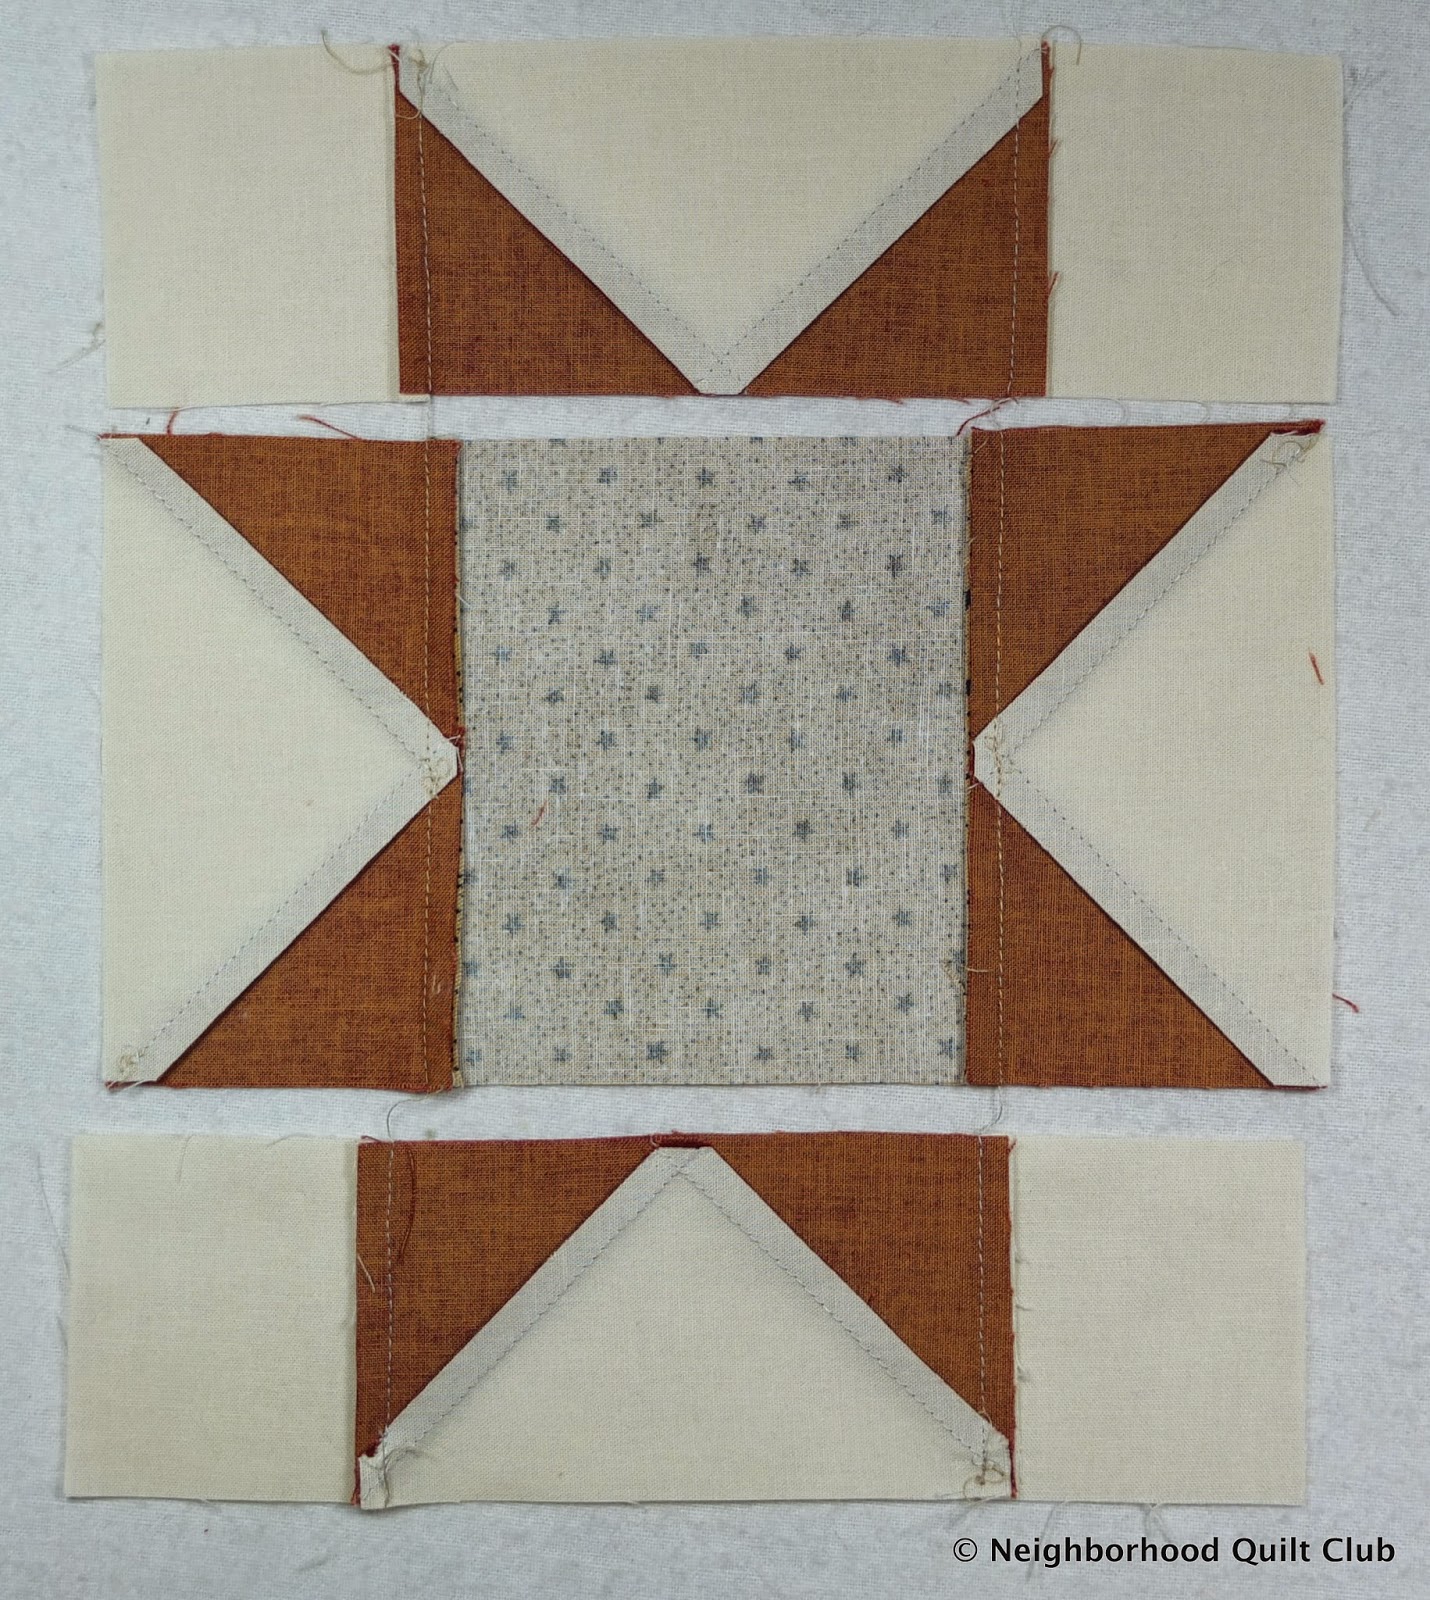
| When you press it won't be possible to press towards the least bulk because you'll end up with too many layers at the corners of the center square (B). Press as shown. |
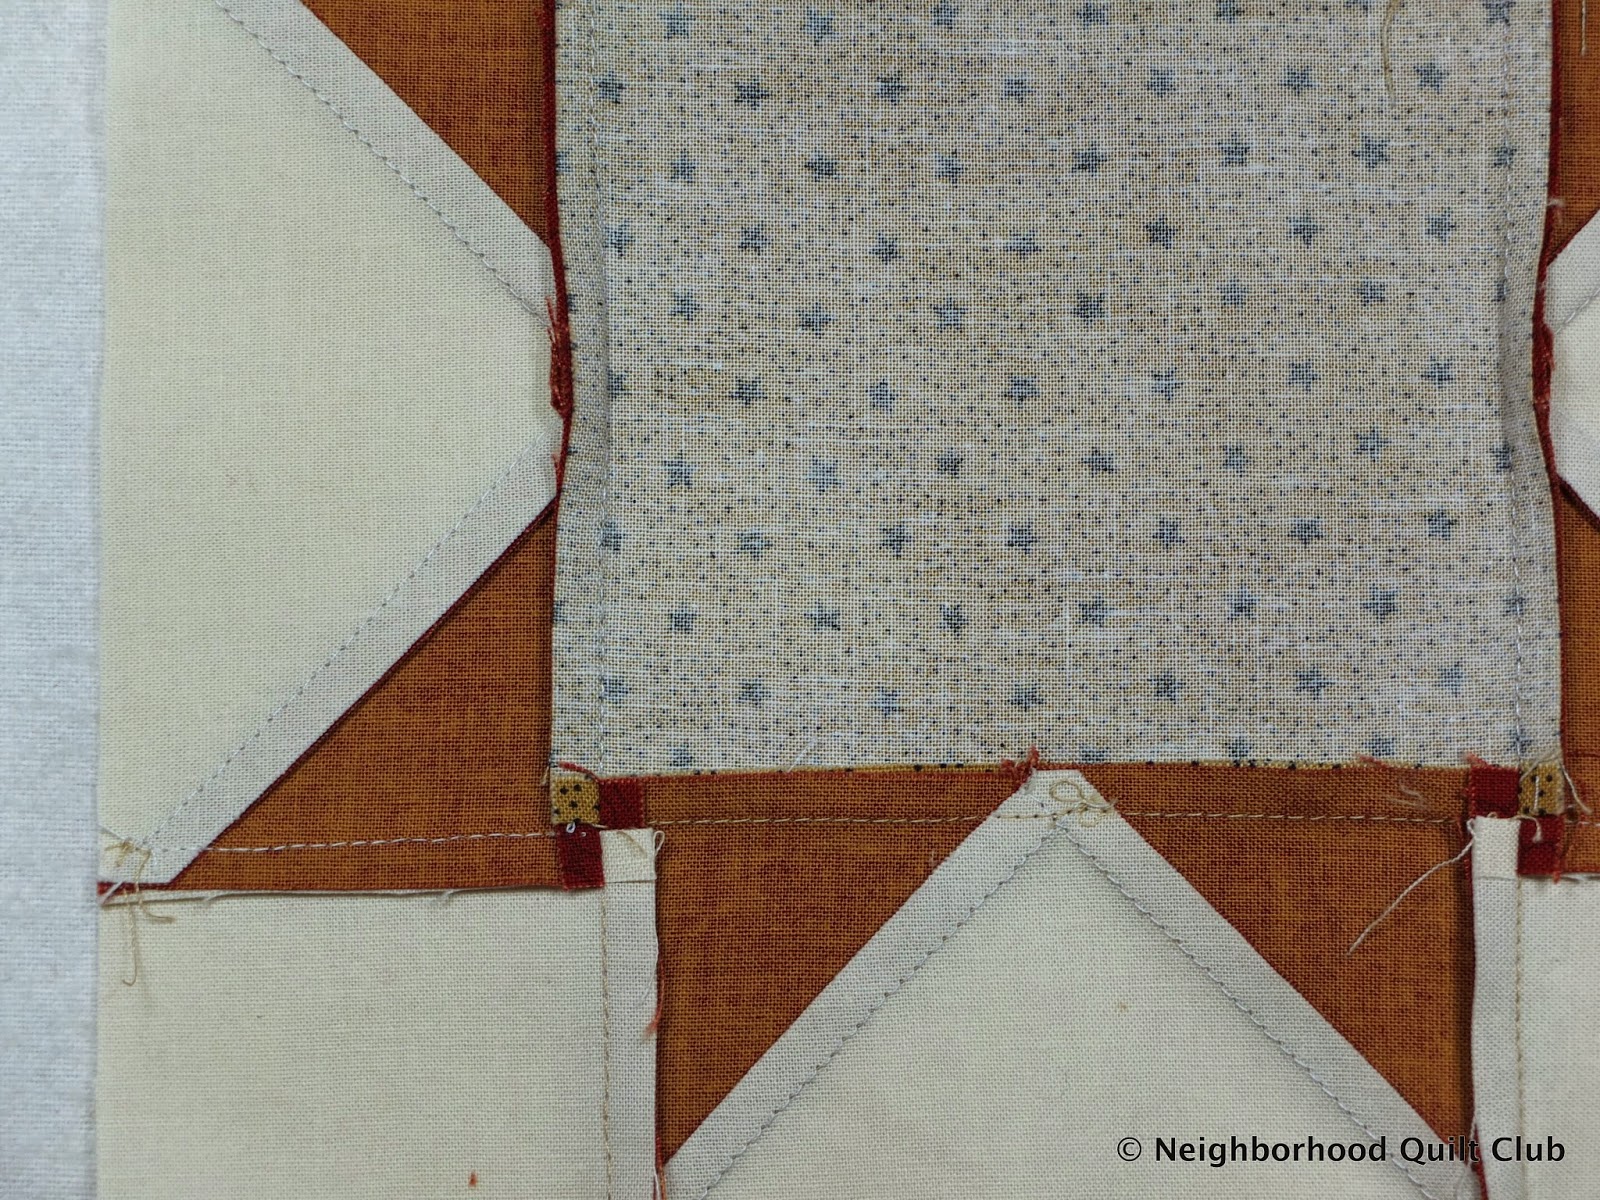 |
| Press open the corners of the center square (B) so that it looks like a mini Four Patch. You may have to remove a few threads to get it to lay flat. This will help reduce the bulk at the corners. |
|
| Press from the right side and trim to 8 1/2" square. If you sewed your diagonal seams correctly you should end up with beautiful points and 1/2" between the outside points and the edge of your block. |
 |
| Dawn's colorway |
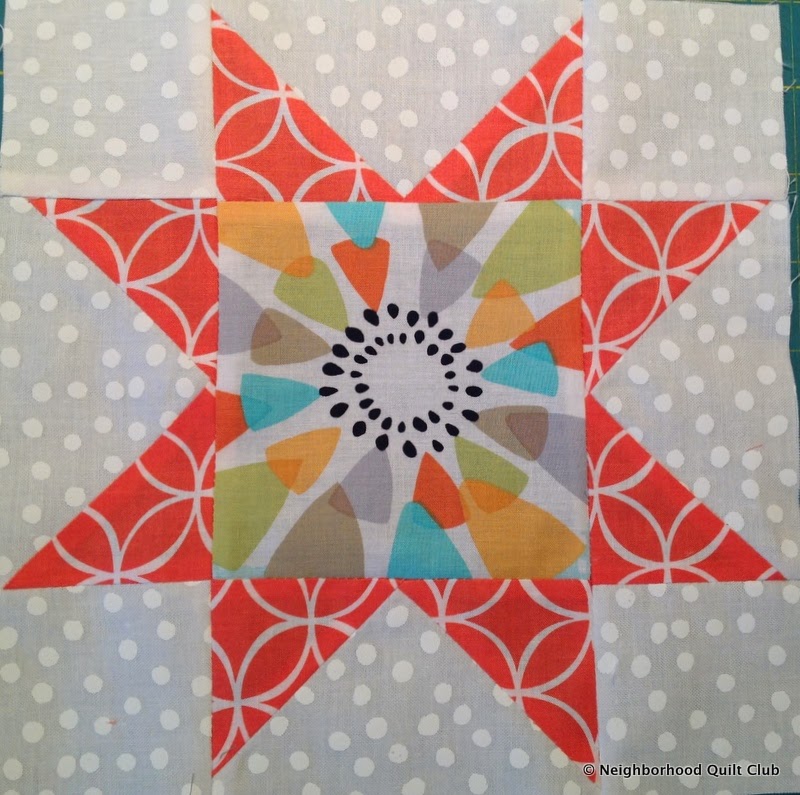 |
| Jaime's colorway. Notice how she fussy cut the center block. I love it! |
