|
| Chisholm Trail 8" finished 8 1/2" unfinished |
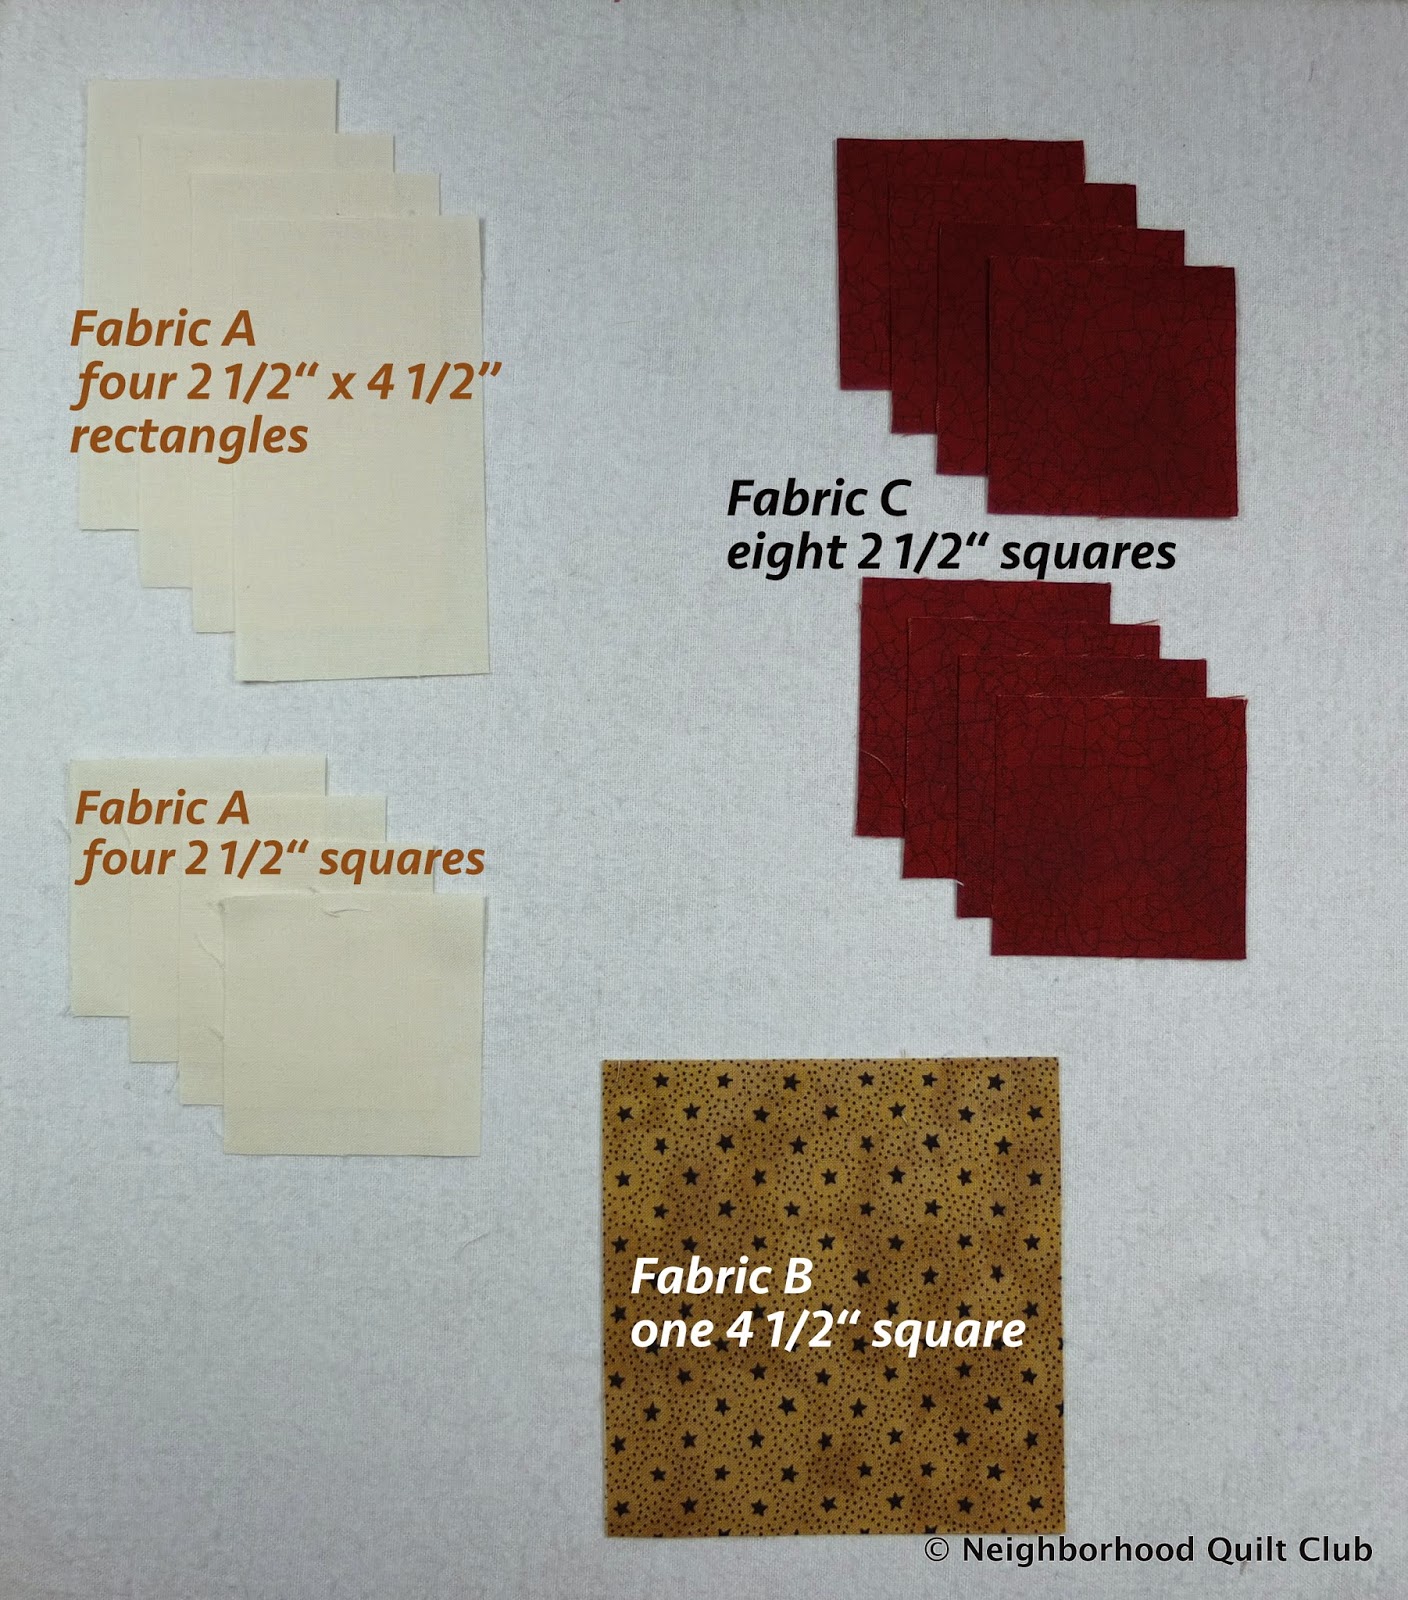
Step 1: Cutting the fabric
Fabric A: background fabric
- A1 - cut one 5 1/2" square (for the flying geese units using Quilt in a Day
- A2 - cut three 3" squares (for half-square triangles)
Fabric B: red (main color)
- B1 - cut one 3" square (for half-square triangles)
- B2 - cut one 7" square
Fabric: grey polka dots (neutral or medium color)
- C1 - cut two 3" squares (for half-square triangles)
- C2 - cut two 2 1/2" squares

Someone told my daughter that if you have to trim your block units (half-square triangles, flying geese, etc) then you aren't a 'true quilter.' My thought is that each quilter should use whatever method helps them to achieve the results that they want.
When sewing half-square triangle units I always teach new quilters to cut the squares a little bit larger and trim the unit to the right size. The amount of fabric that is thrown away is negligible, and the blocks are so much easier to piece when the smaller units are the exact size needed!
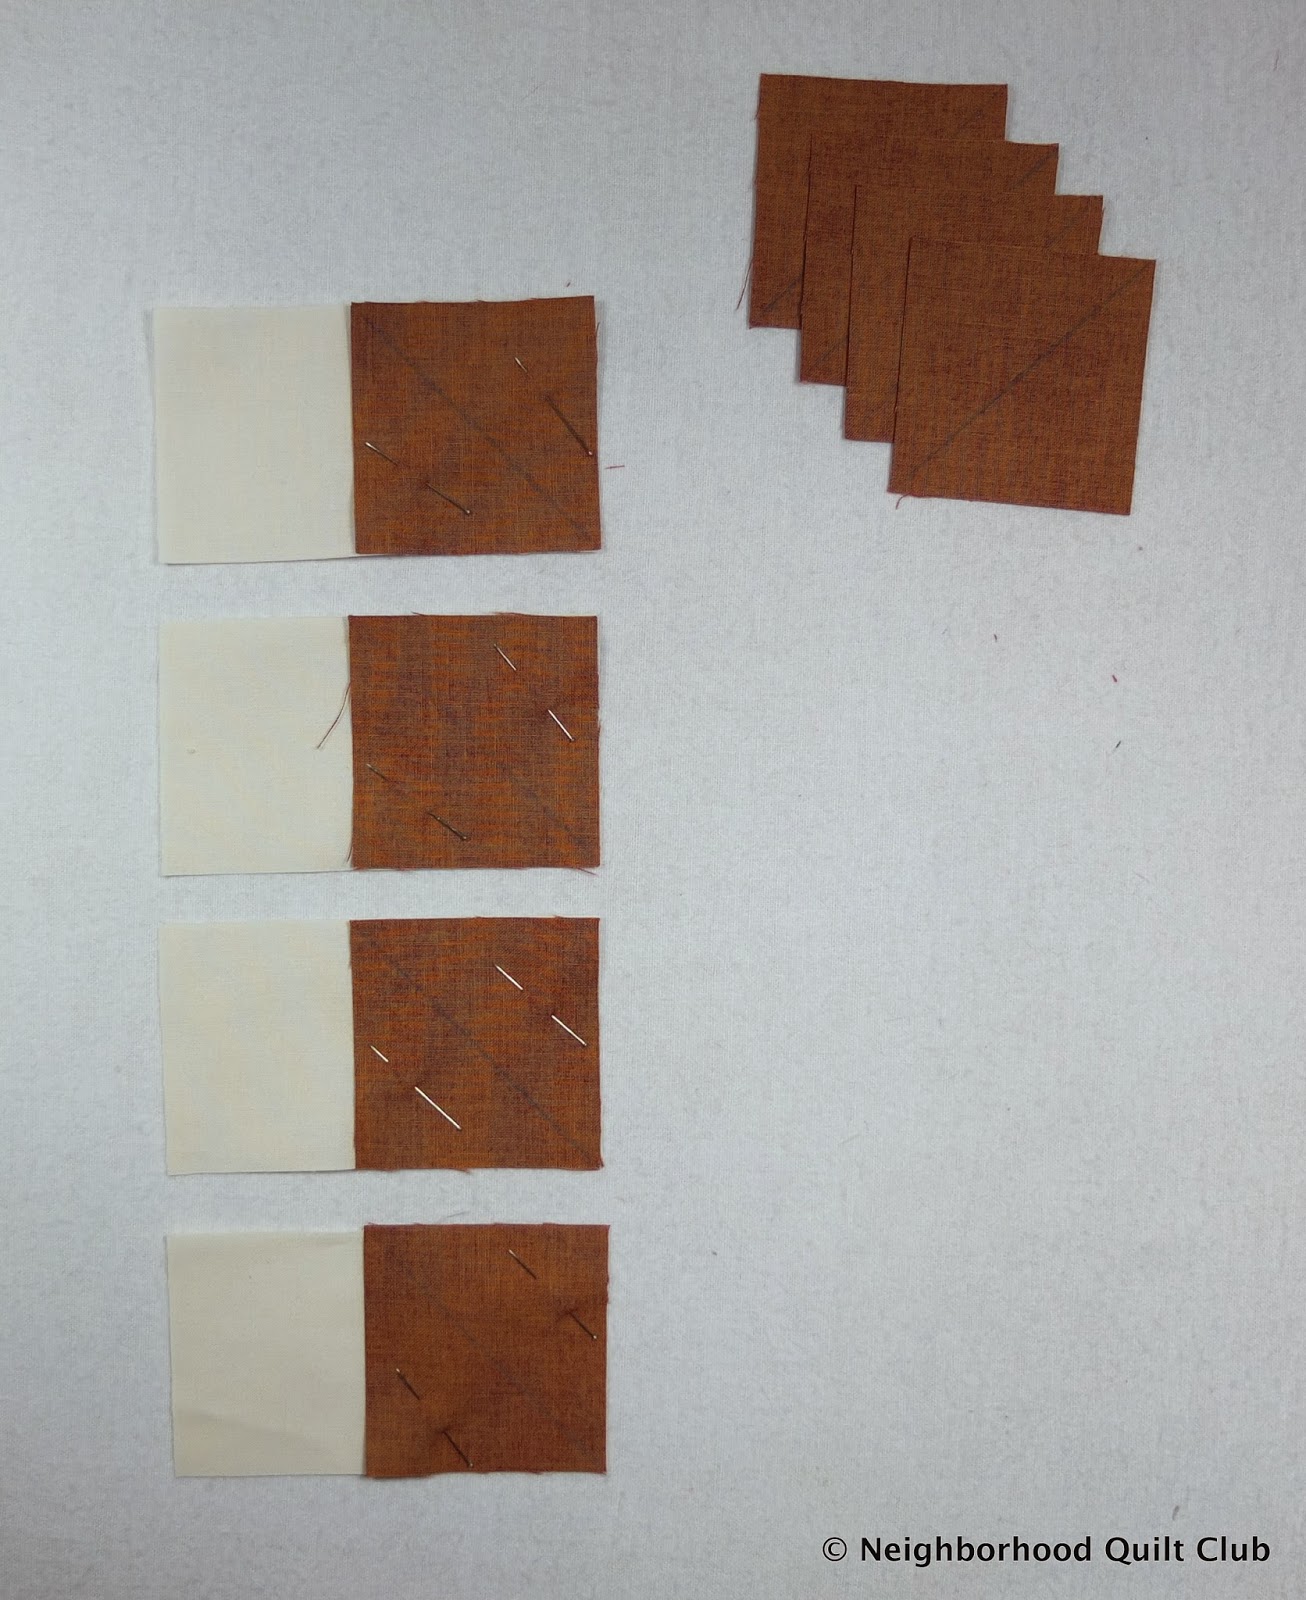
Step 2: Drawing Diagonals and Sewing Half-square Triangle units, starting the Flying Geese units.
I'm using the Large Flying Geese Ruler by Quilt in a Day to make my Flying Geese units. If you have a different method you like, you'll have to adjust the cutting directions in Step 1.
I sew all my seams a scant 1/4". You should do a few samples to make sure that however you are sewing your seam will give you a 1/4" seam. If you need a refresher or reminder on how to check your seams, visit this post.
 |
| Draw diagonal lines from corner to corner on all the A pieces. Place one A2 and the B1 piece right sides together and pin. Place an A2 and both C1 pieces right sides together and pin. Carefully center the A1 square right sides together with the B2 square and pin in four places. |
 |
| Sew a scant 1/4" seam on both sides of each diagonal line. |
 |
| Cut along the diagonal lines. |
 | |
| Press all seams open. Trim the half-square triangle units to 2 1/2". They are done. |
 |
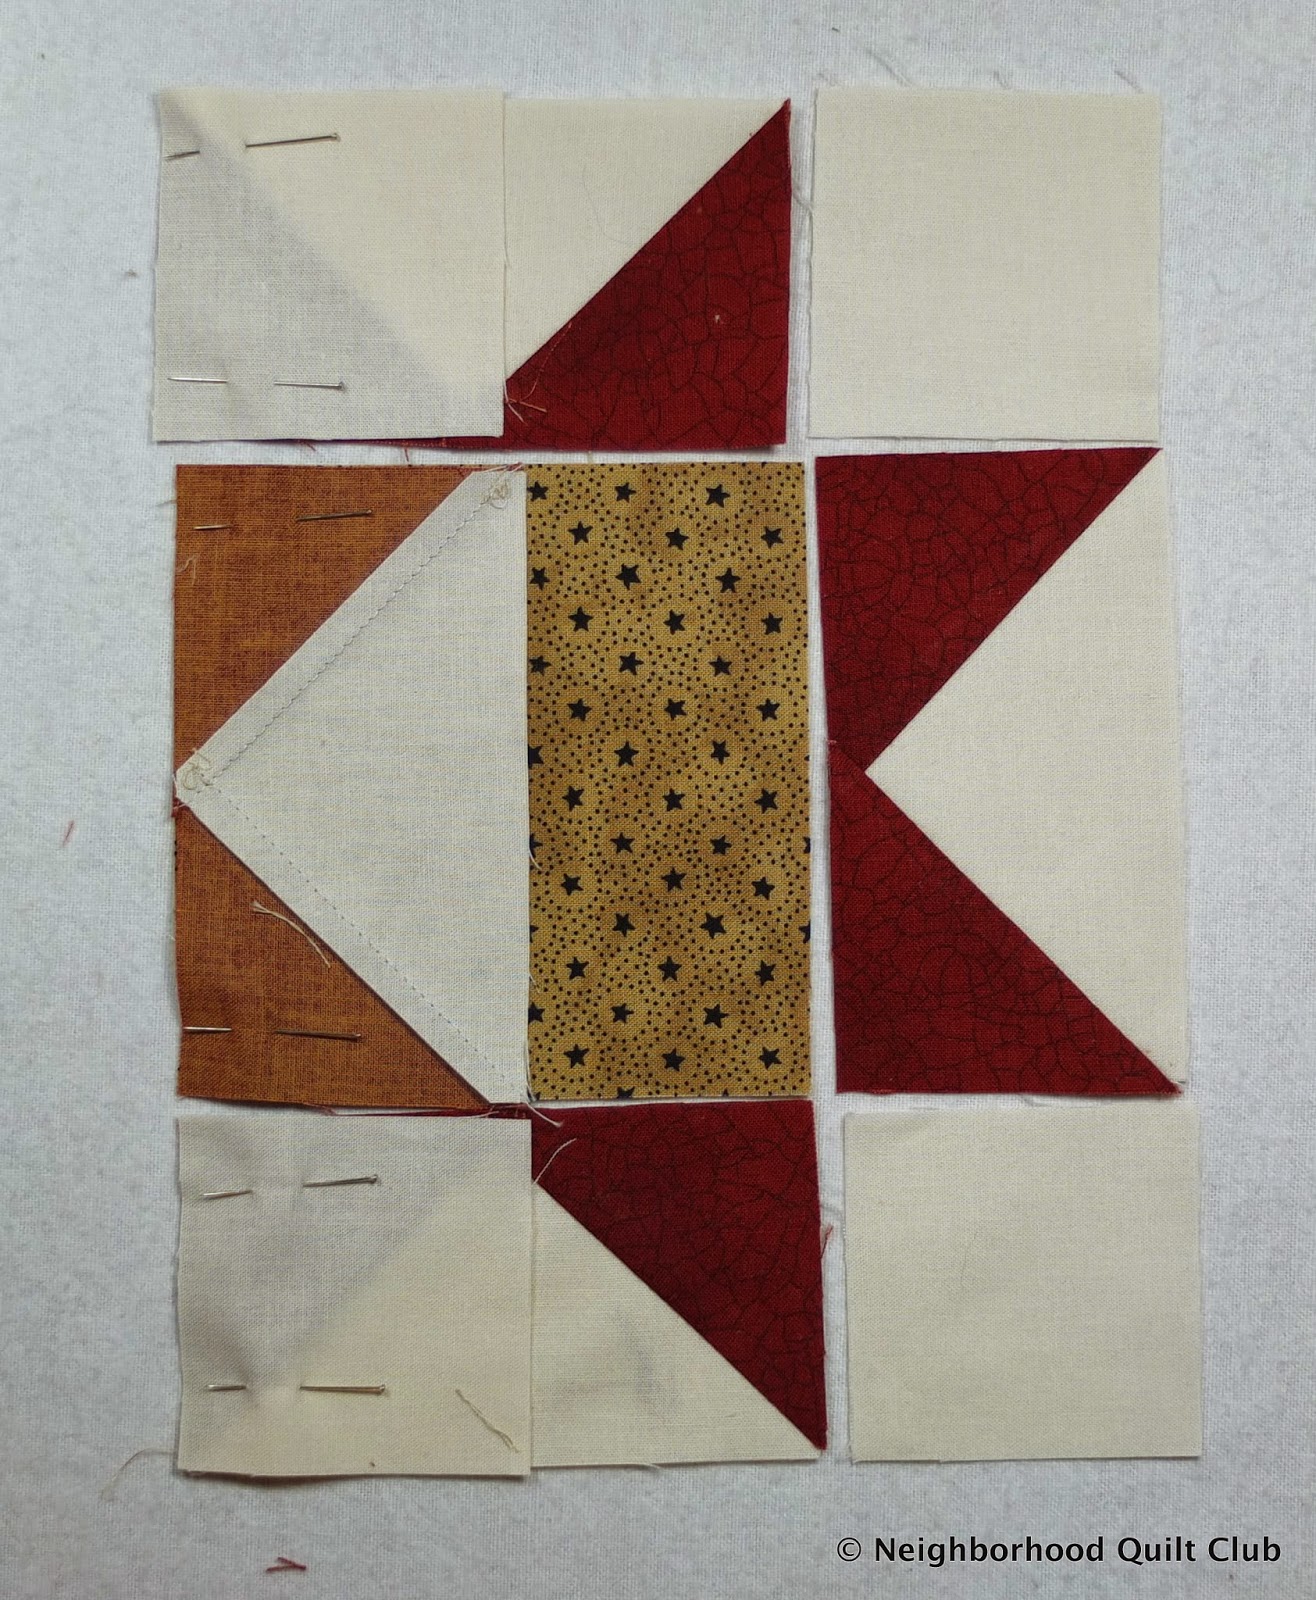
| I like to start laying out my block as soon as some of the pieces are done. It helps keep me organized and know what step I'm on. |
 |
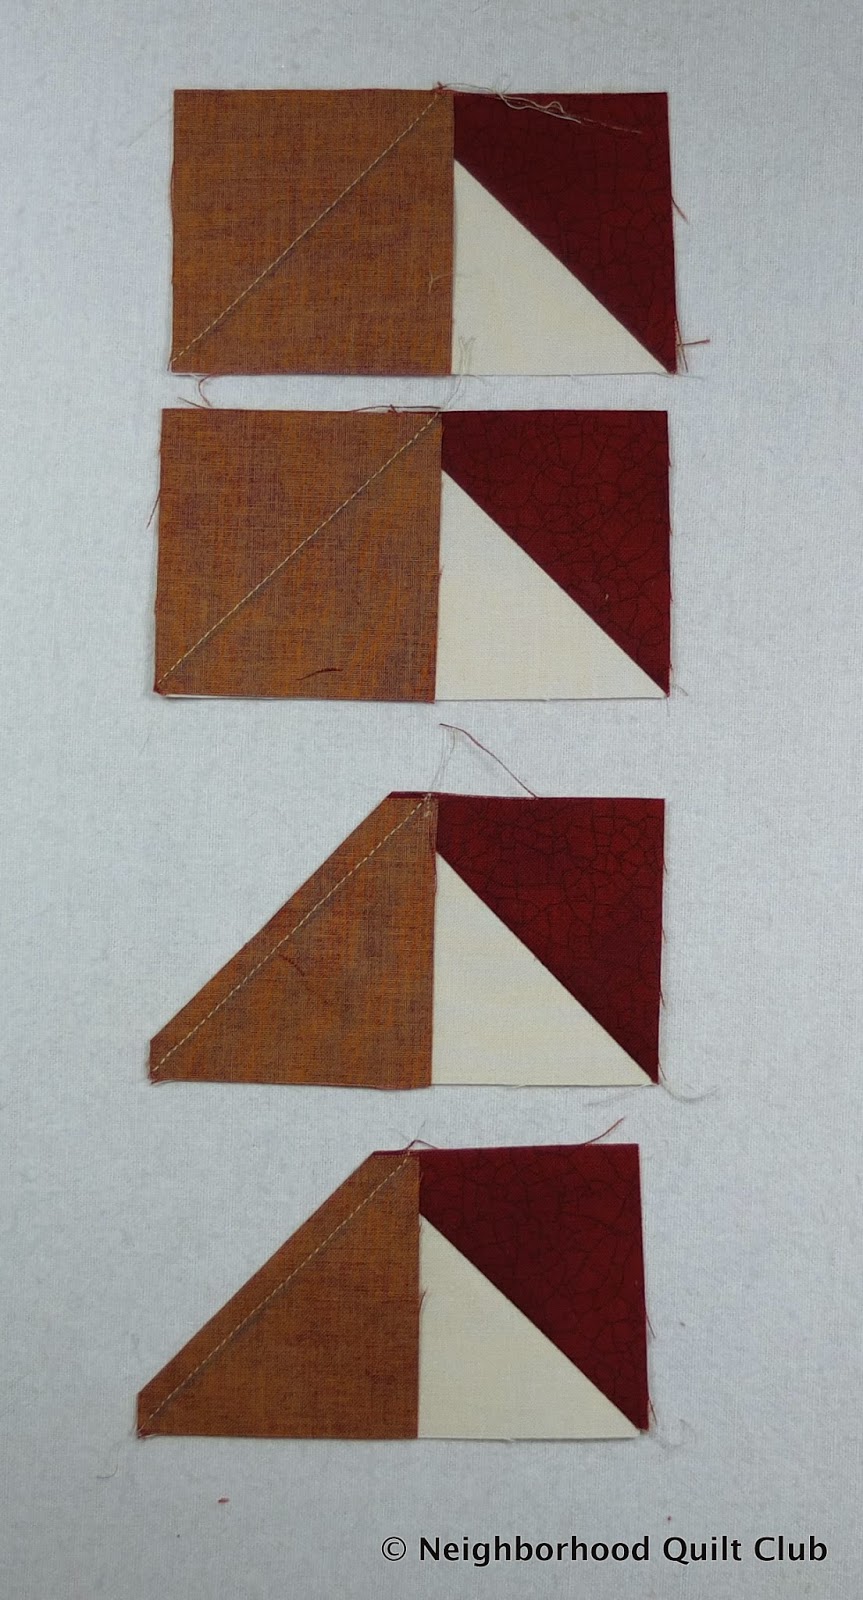
| Do not match the center seams of the A1-B2 pieces! Match the four corners! Place a white triangle right sides together on the red triangles, as in the photo. |
 |
| Draw a diagonal line that goes from the corner of A1 through to the opposite corner of B2. Notice that all four corners of the A1-B2 pieces match. Sew a scant 1/4" seam on both sides of the drawn diagonal line. |
 |
| Cut along the drawn diagonal line. Press seams open. Your pieces should look like the ones in the photo. |
 |
| Use your Flying Geese ruler. Line up the red triangle of the ruler with the seams on A1. Make sure the point of the ruler is over the sewn point on the block. If you click on the picture it will enlarge and you can see it better. Trim all three sides. Flip the piece and center the ruler matching the seams. Trim the last part of the Flying Geese unit. |
 |
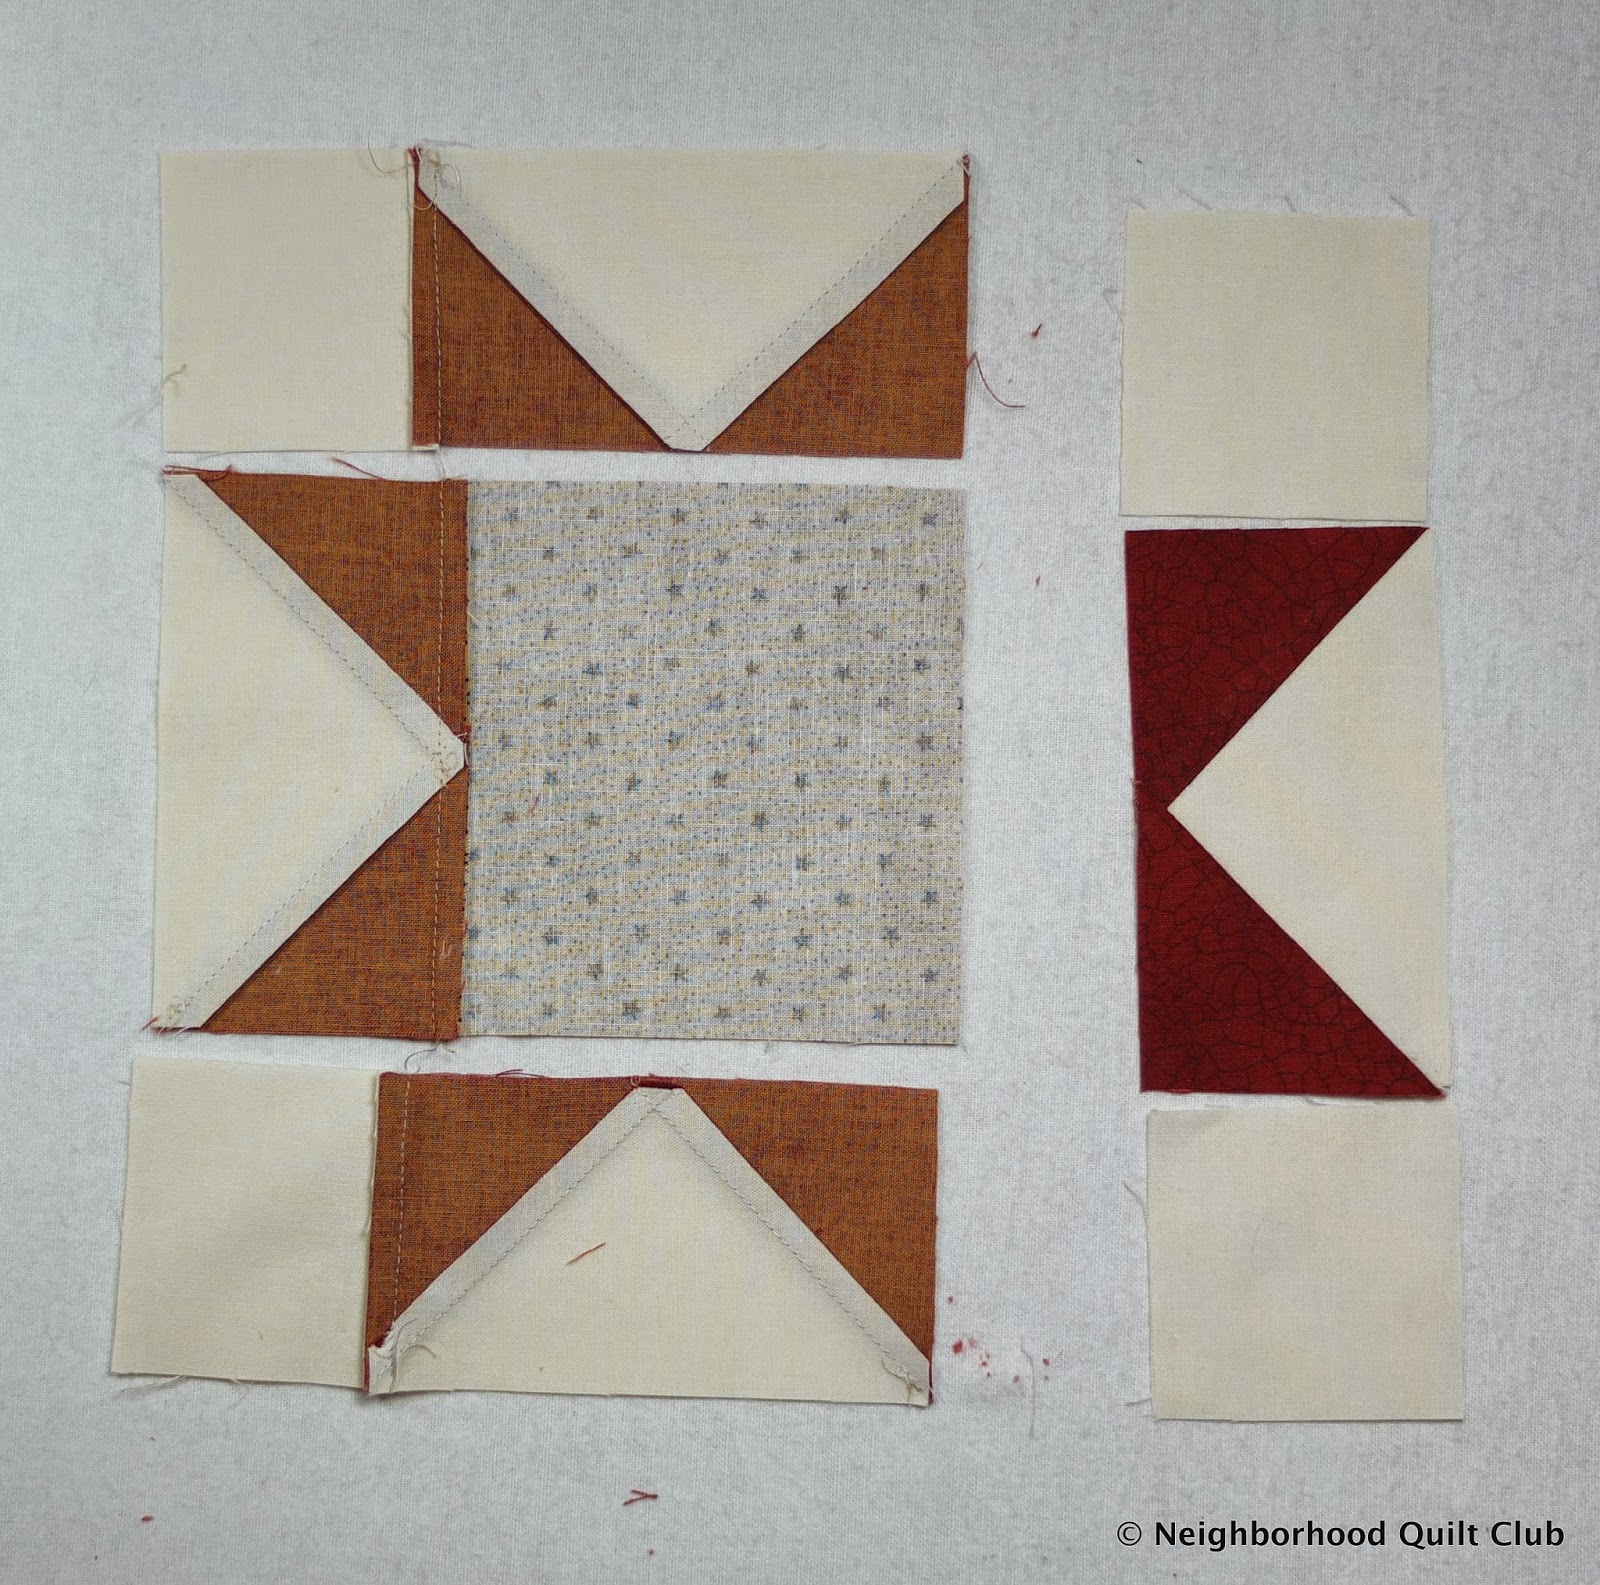
| The photo shows all the trimmings |
 |
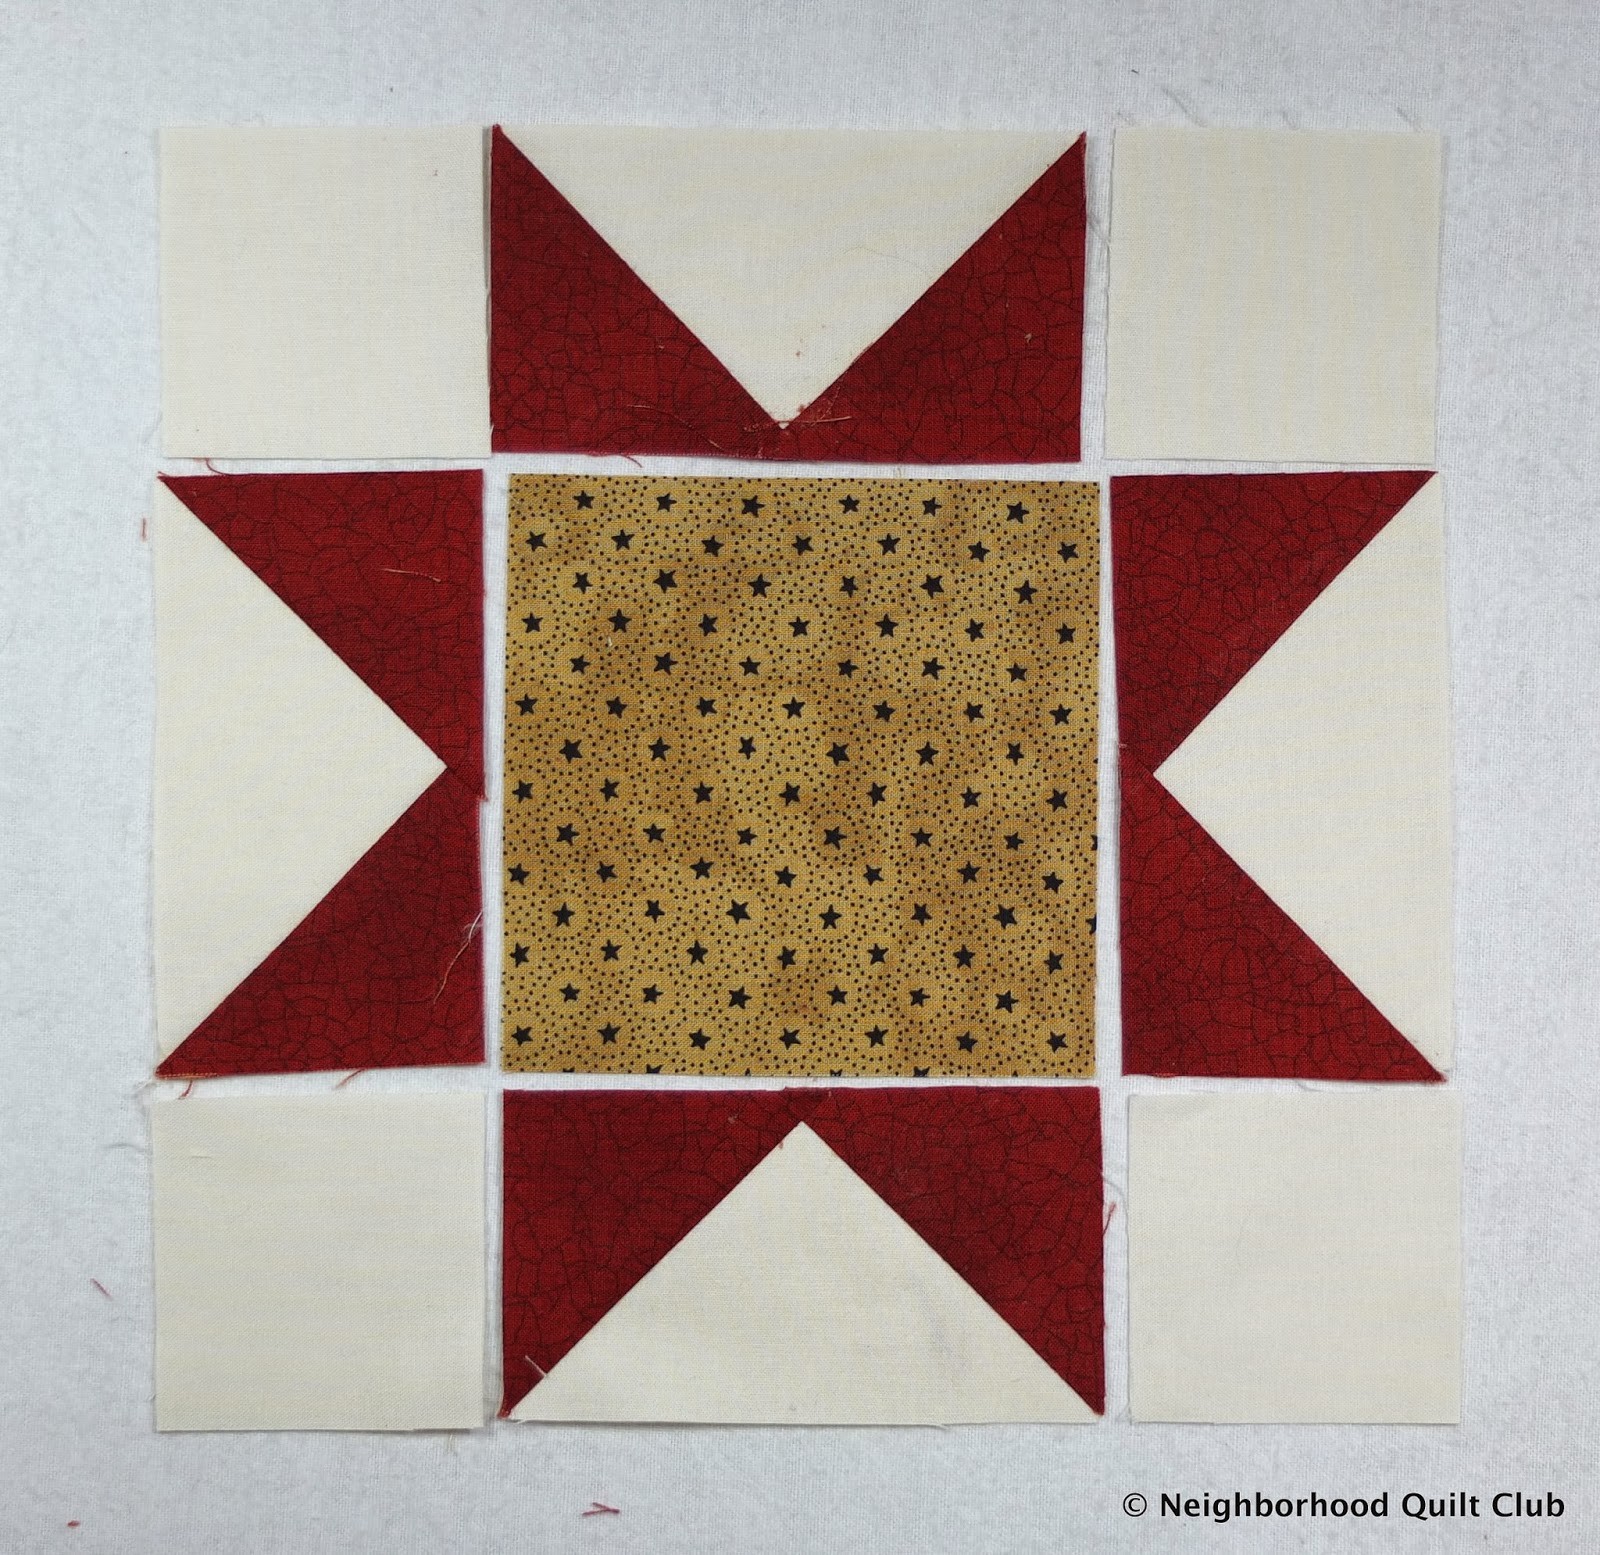
| Finish laying your block out on a portable surface. I use my design and pressing board. |
 |
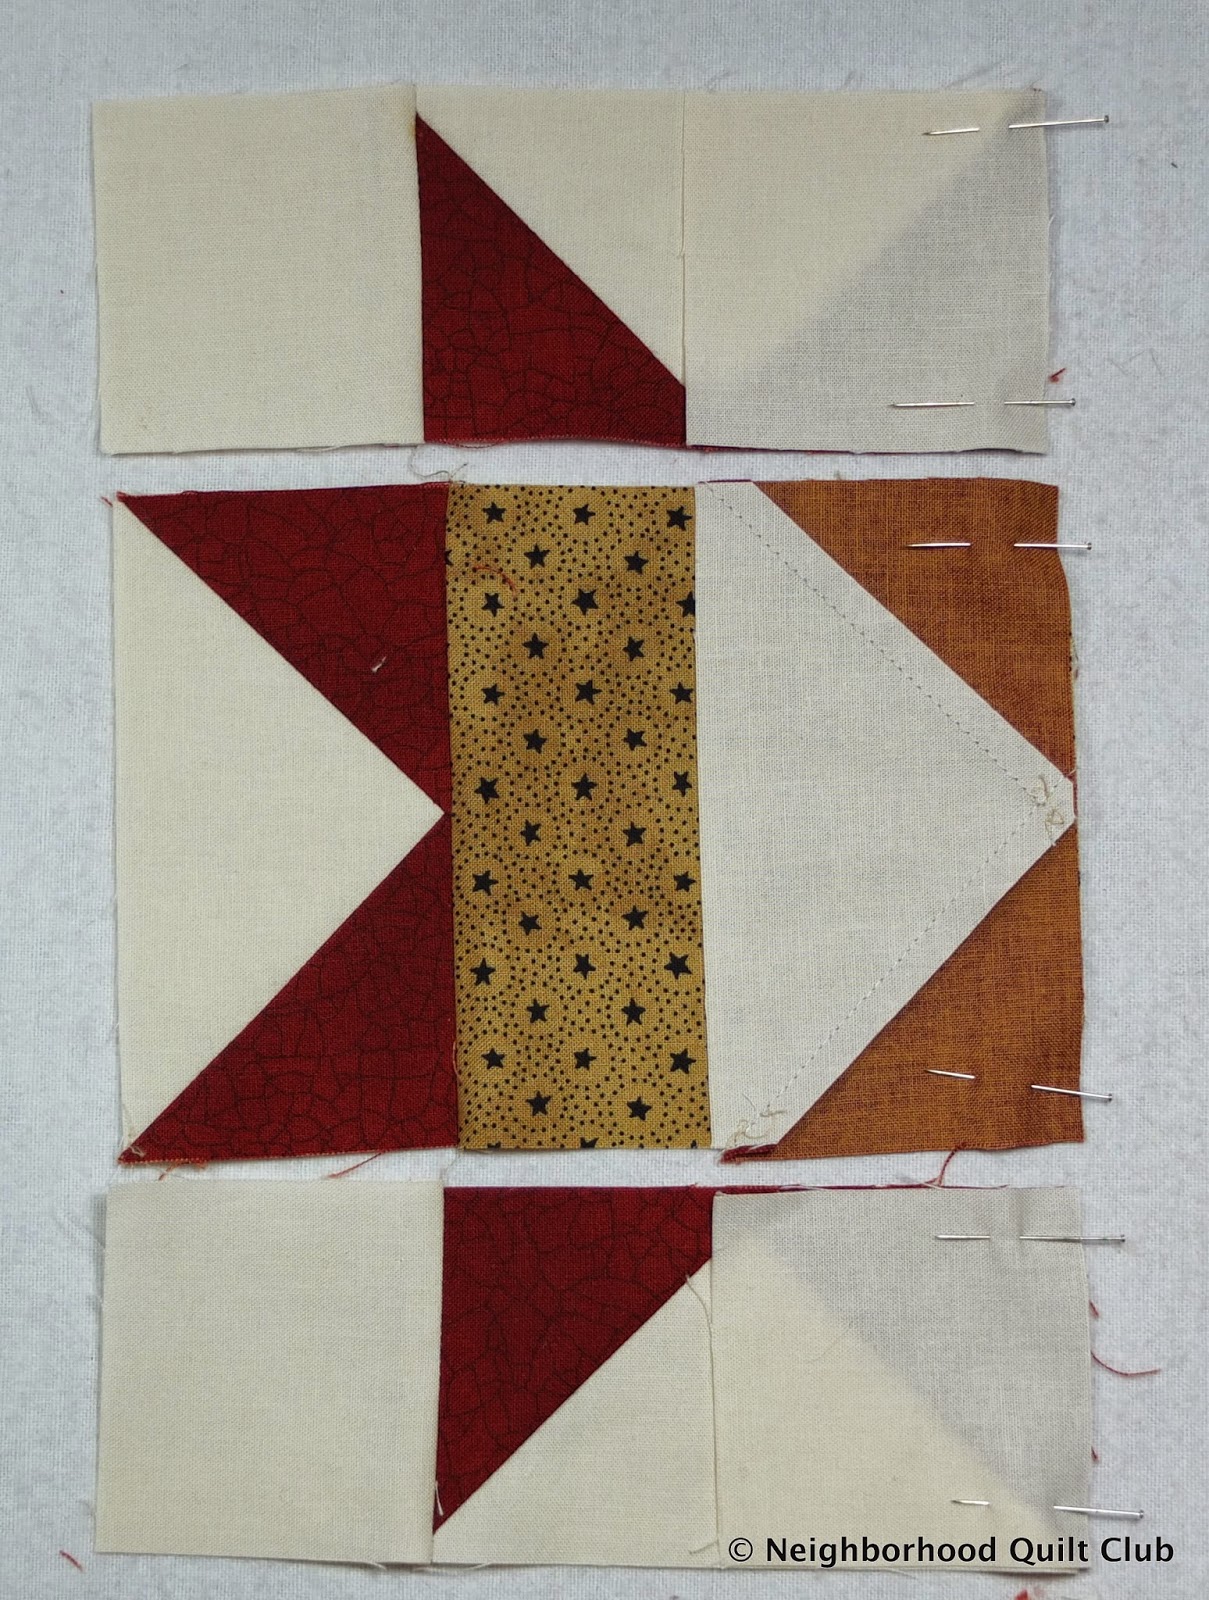
| Sew the center square first. It's wrong side up in the photo above. |
 |
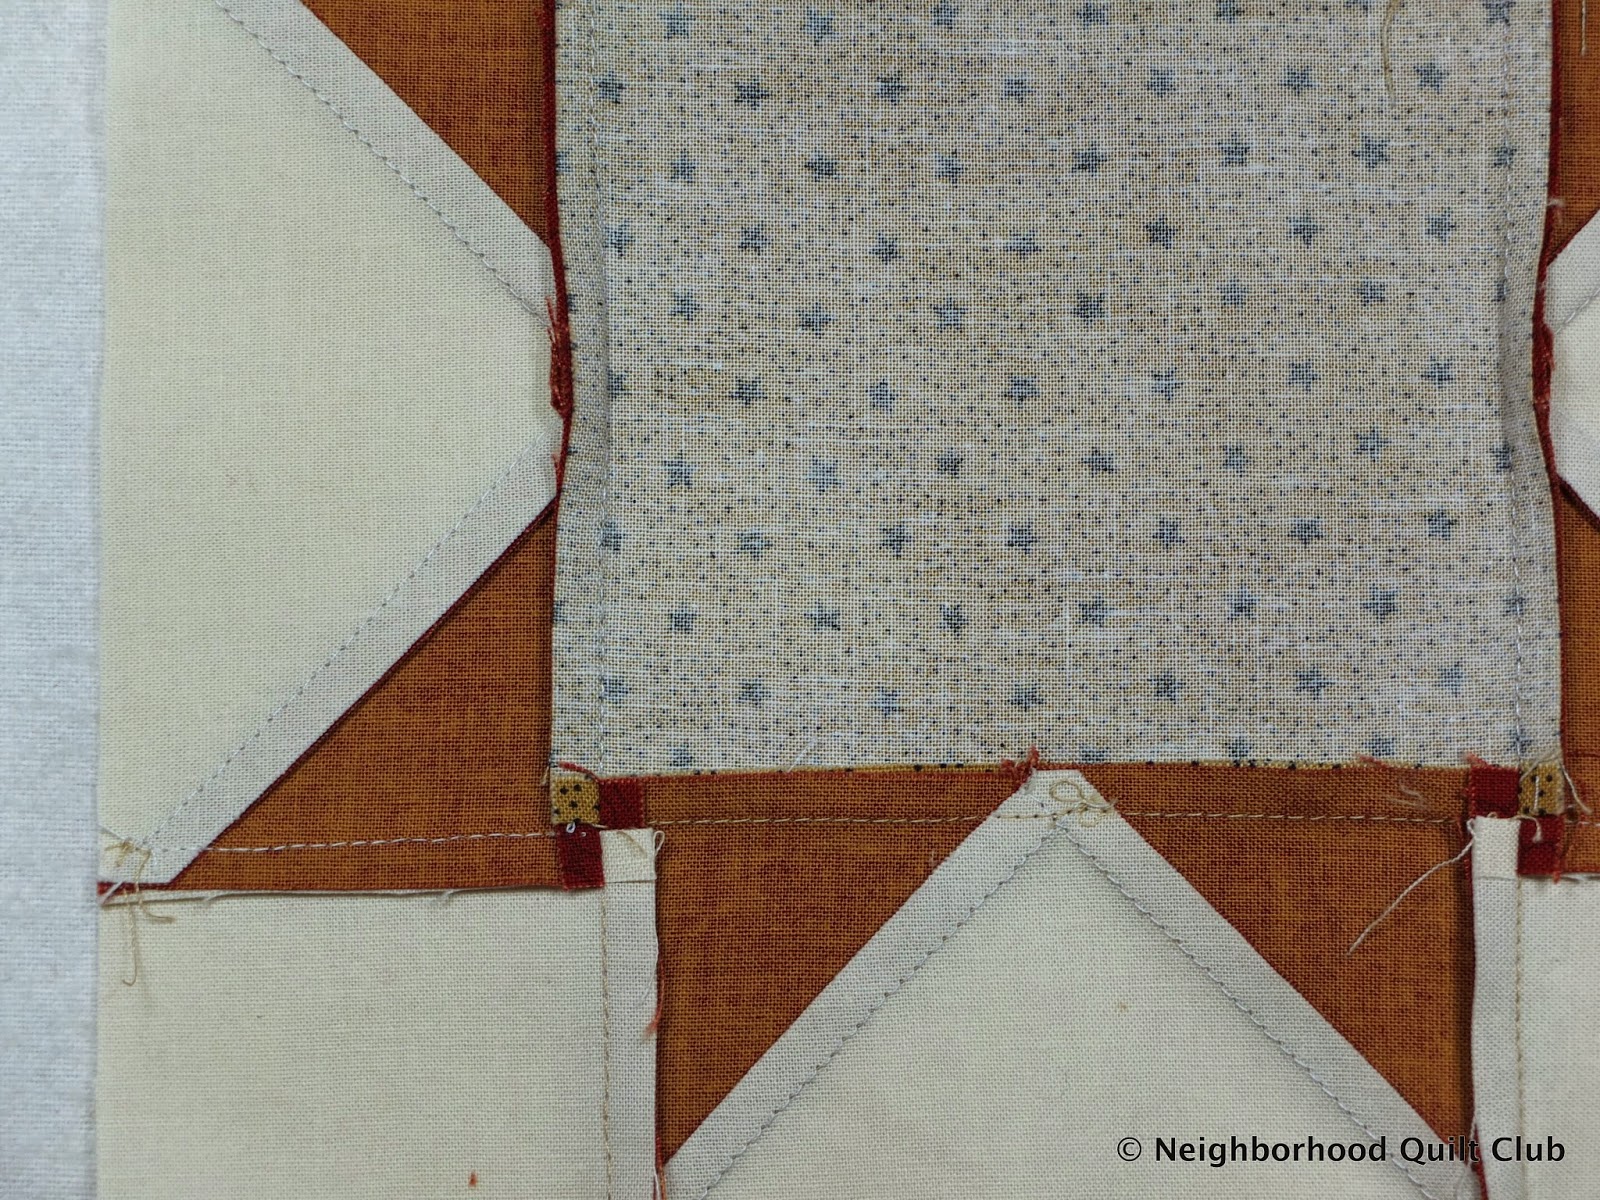
| It's worth the extra effort to spend the time to match your points. They won't always be perfect, but the more you practice getting them to match, the better and faster you will be at getting good corners. The center should measure 4 1/2" square. |
 |
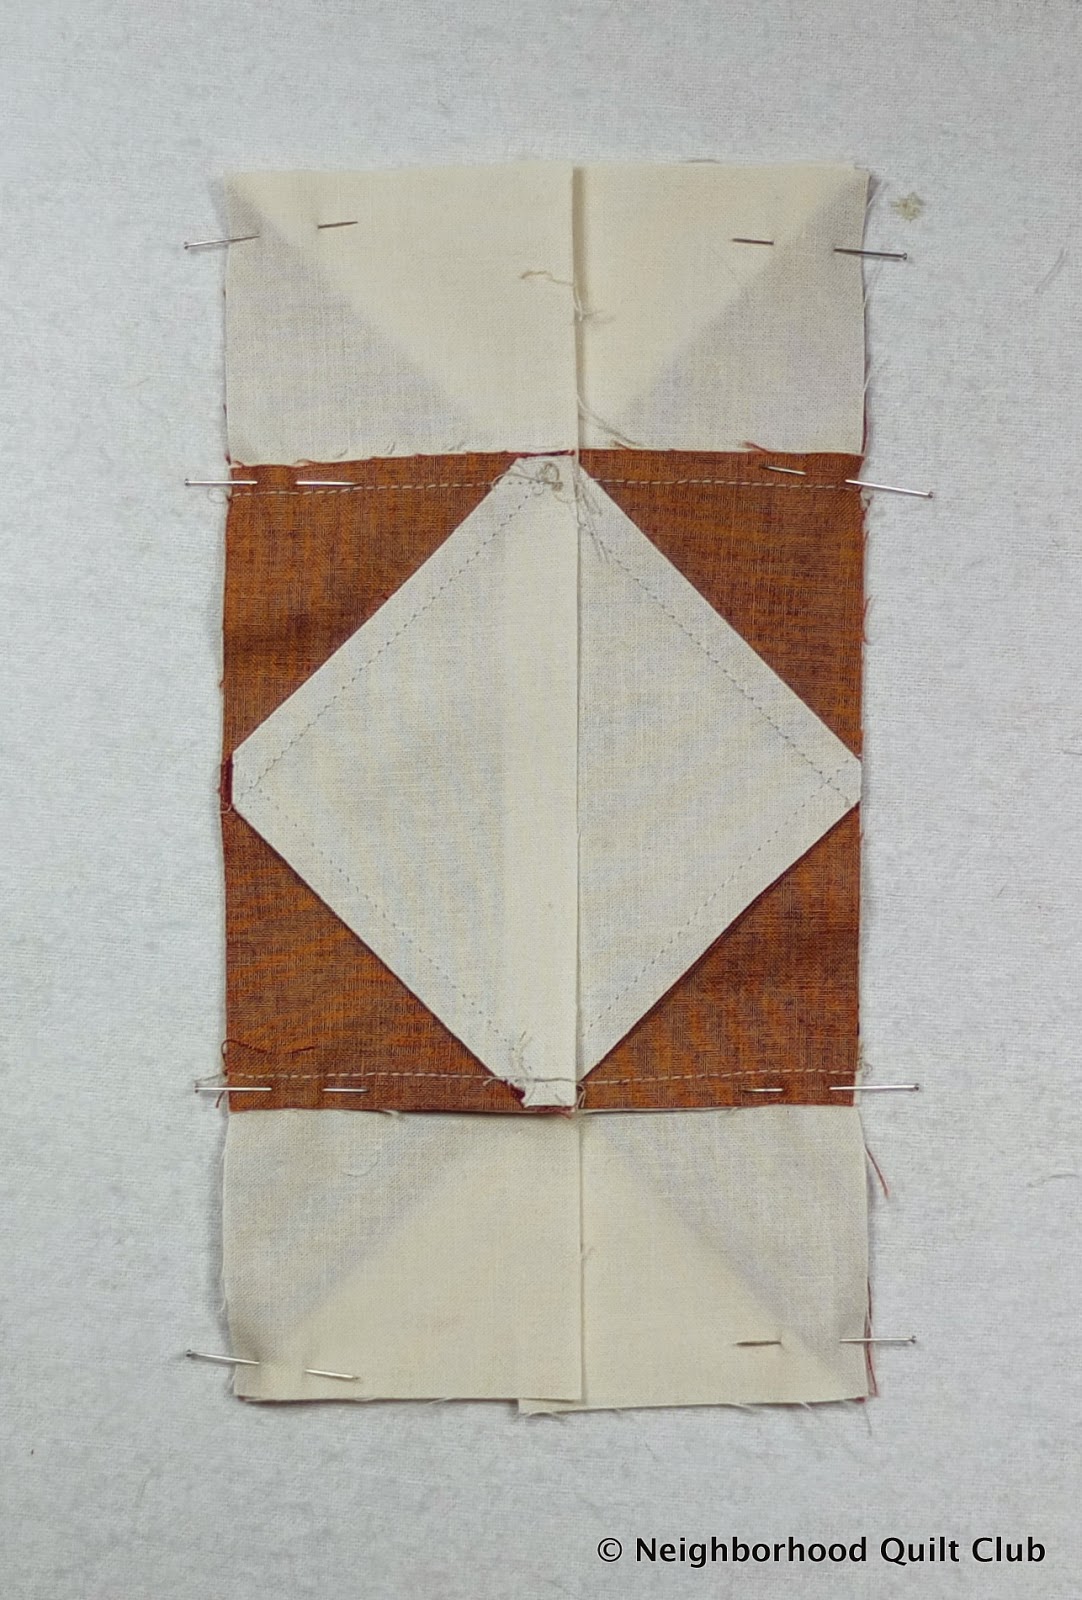
| Lay all the block units out. I prefer to sew in columns, but some people like to sew the rows first and the columns next. |
 |
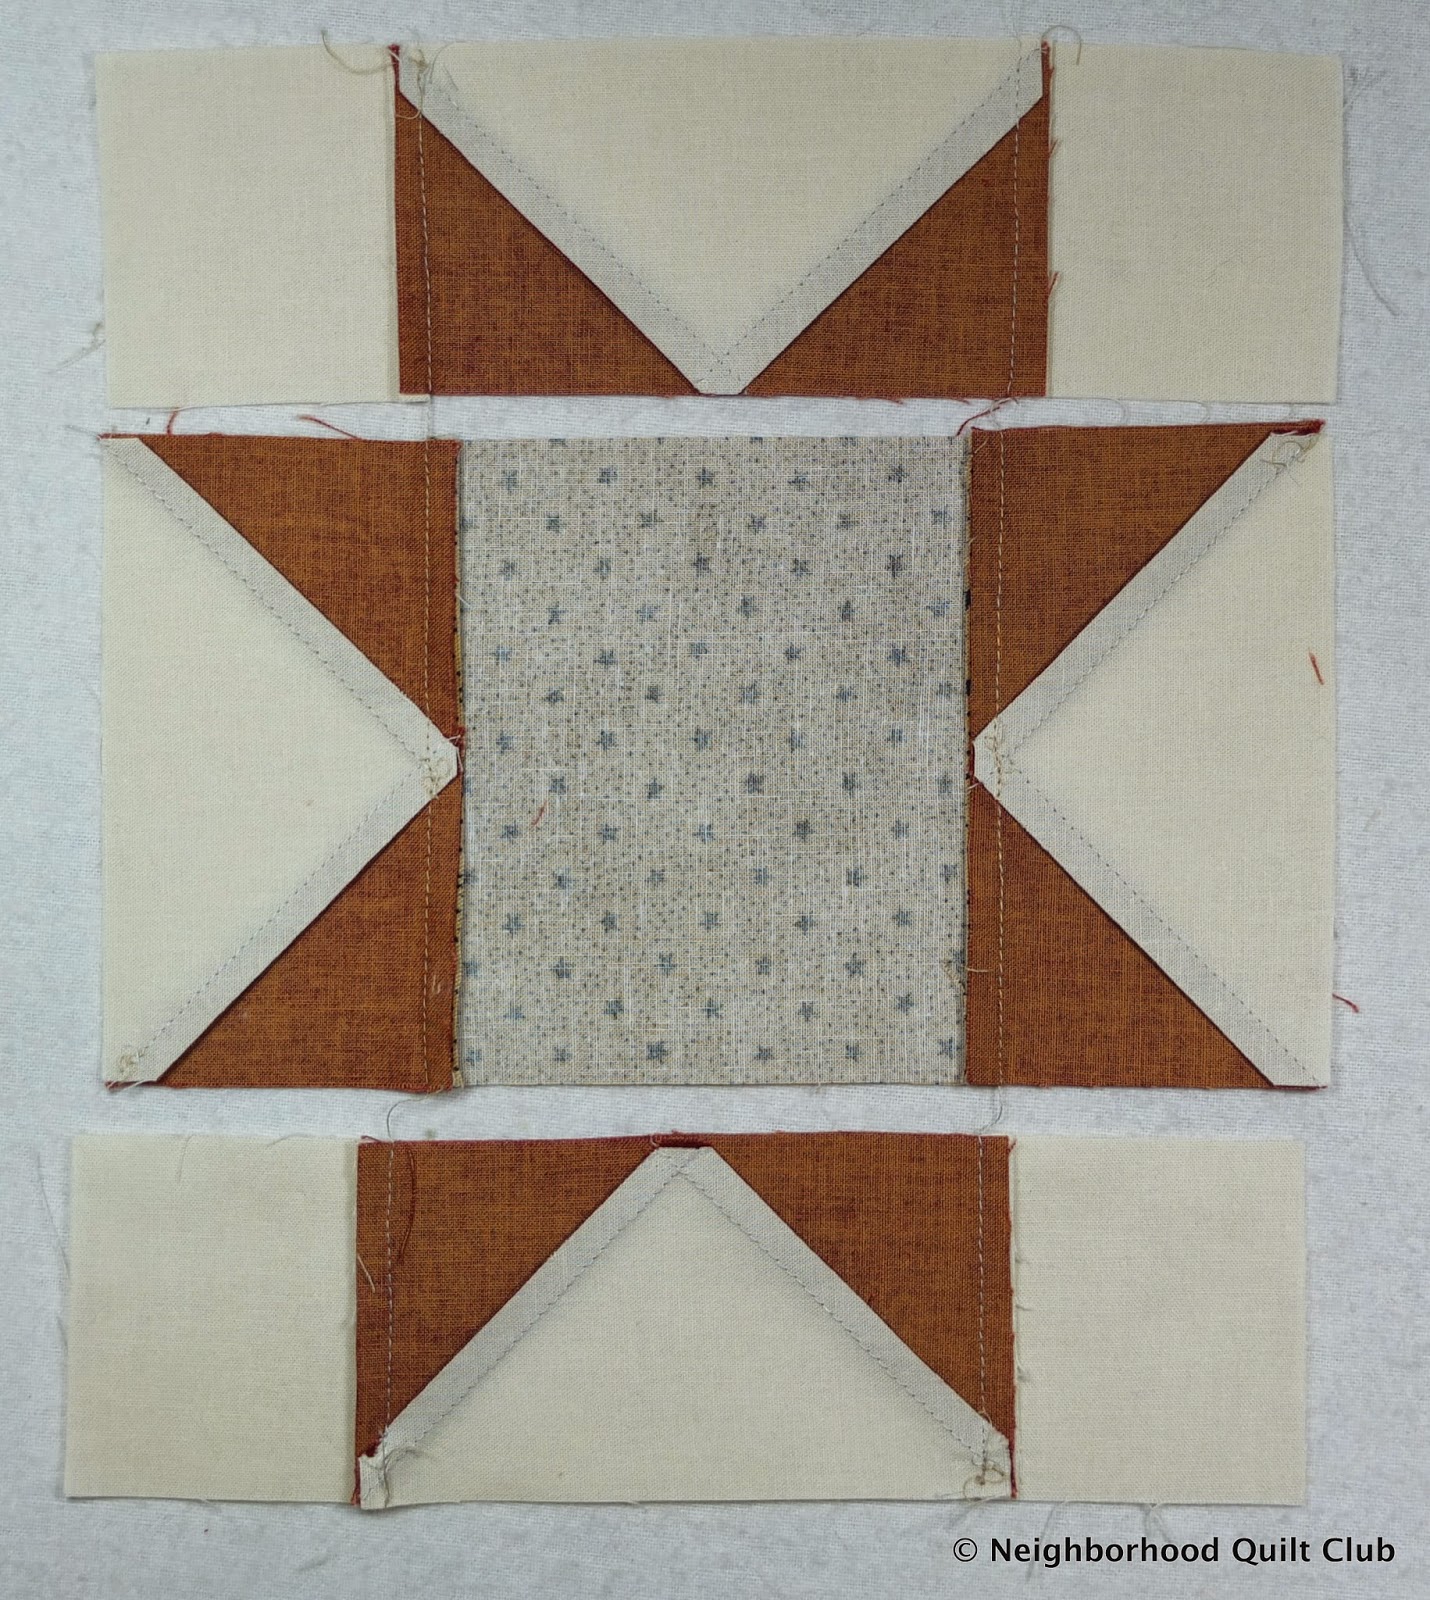
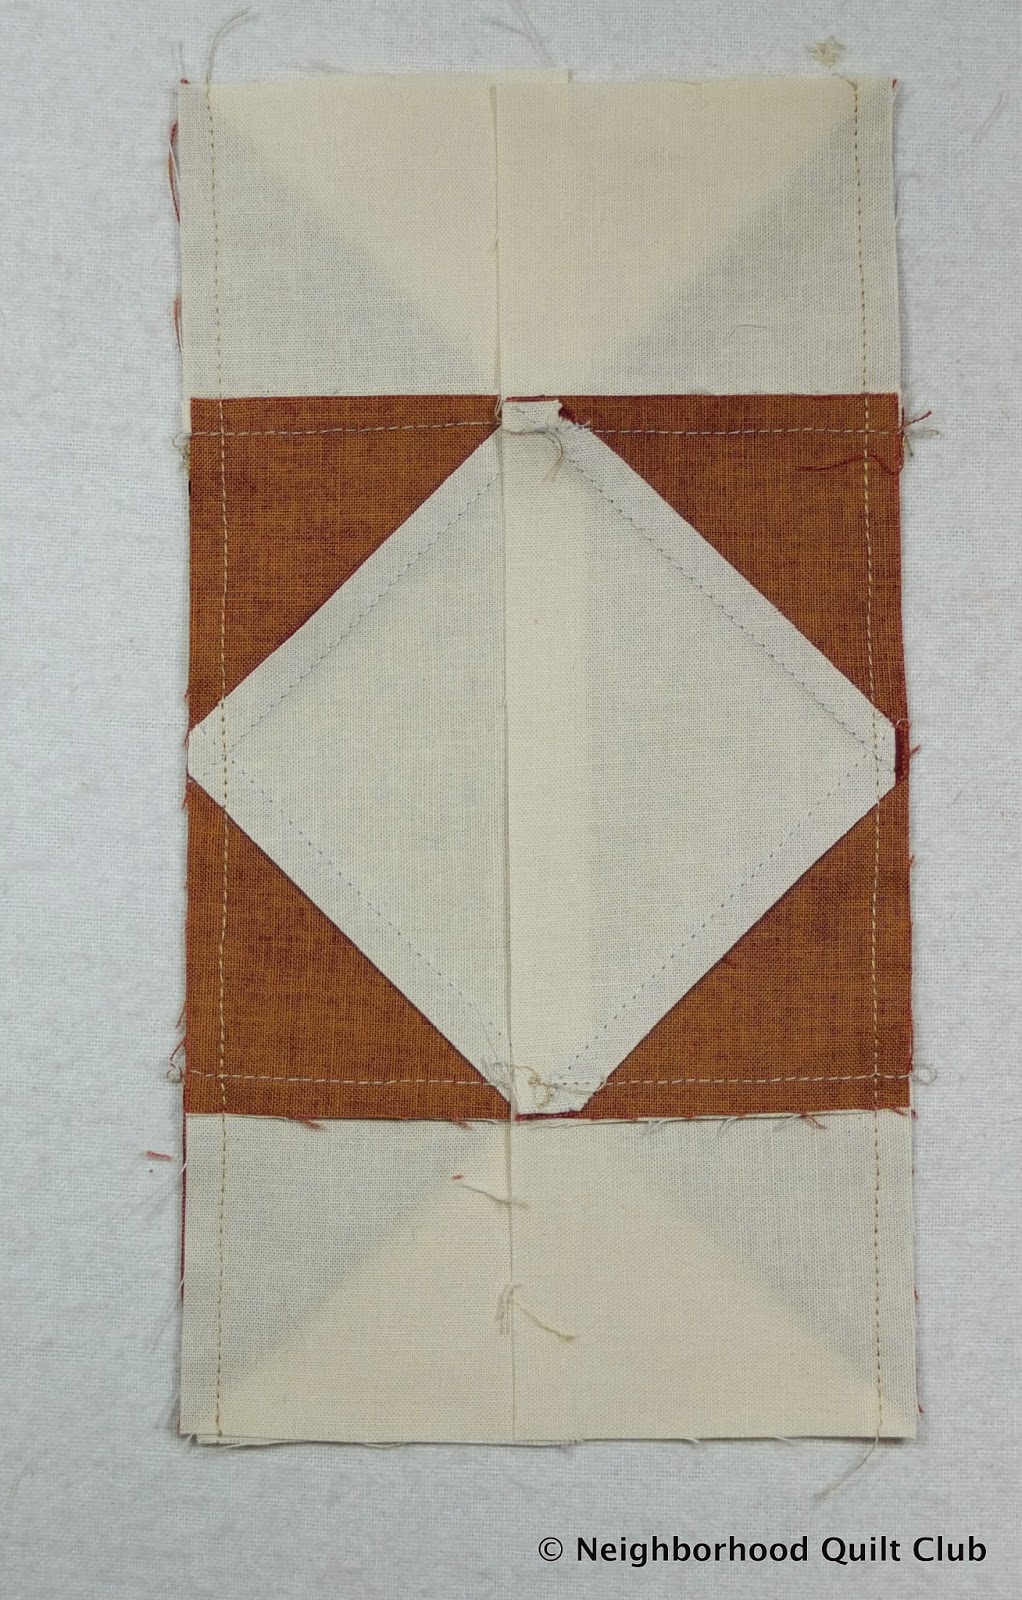
| Make sure you pin the columns together where the seams match. When the seams are pressed open there is no way to 'nest' them. I used pins every place the seams needed to match. |
|
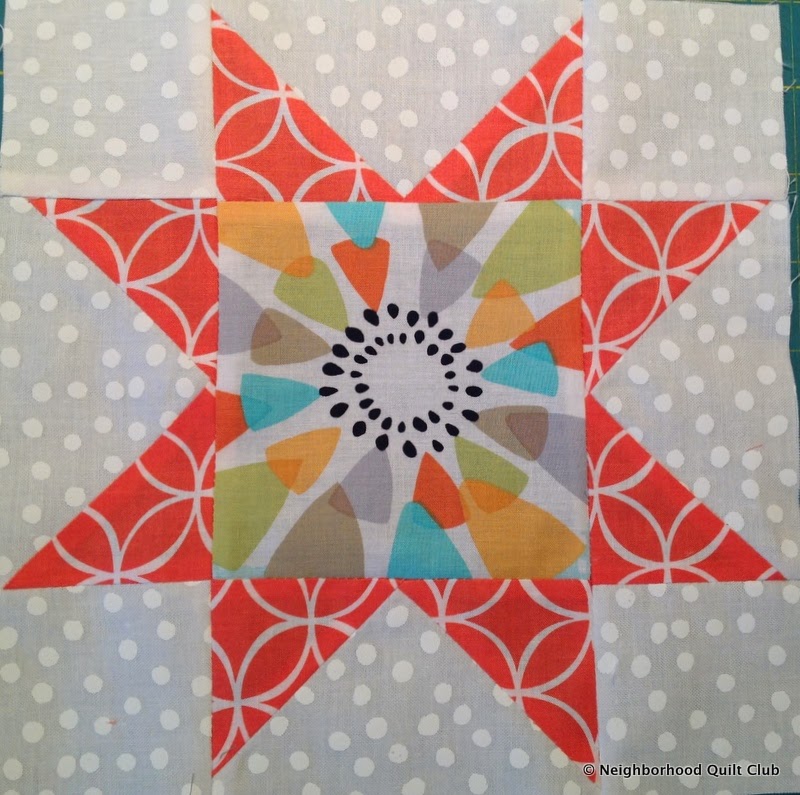
| 8 1/2" Chisholm Trail block ready to be sewn into a quilt. |
 |
| Dawn's colorway (thanks for sharing!) |
 |
| Jaime's colorway. Thanks for sharing! |
Feel free to send me photos of your block. We all love to see what our neighbors are working on. Your color choices are inspiration for all of us!