Here's another block I will be adding to my Christmas quilt. It's not part of our regular Block of the Month blocks, but I want to make more than 9 blocks for my quilt.
 |
King's Crown
|
This block is fairly easy, using both half-square triangle units and flying goose units.
Cut from background fabric:
(A1) four 2 1/2" squares
(A2) one 6" square (for the half-square triangles)
(A3) one 5 1/2" square (for the flying goose units)
Cut from dark (mine is red)
(B1) two 4 7/8" squares, cut in half diagonally)
(B2) one 6" square (for the half-square triangles)
(B3) one 7" square (for the flying goose units)
Cut from medium (mine is the print with the Cardinals)
(C) one 6 1/4" square

 |
Woops! I forgot to cut B1 squares out at the beginning. Here they are, cut on the diagonal.
If I am cutting and sewing along the bias, as I will with these pieces, I usually press the fabric before cutting on the diagonal with some spray sizing to make them just a little stiffer. This prevents my bias from stretching uncontrollably while sewing. Cut the square, press with spray sizing, then cut along the diagonal. |
Units Needed for this Block
If you are a super-quilter and don't need a tutorial for each of the individual units, here is what we will be sewing:
Eight 2" finished (2 1/2" unfinished) half-square triangles. I made mine from A2 and B2.
Four 2" x 4" finished (2 1/2" x 4 1/4" unfinished) flying goose units. I made mine from A3 and B3.
One square in square unit. I made mine from B1 and C
Four 2" finished (2 1/2" unfinished) squares.
You can see all the units in the photo below.
 |
All the units ready to sew into the final block.
|
If you want step-by-step tutorial photos to make the units listed above..... keep reading!
Sewing the Flying Goose Units
This is my favorite way of sewing flying goose units. There are a few different ways of sewing them. You can follow the directions for this method, or you can find different methods here, and here. Your finished flying goose unit should measure 4"x2". This method uses the Quilt in a Day ruler found here.
 |
Lay A3 on top of B3. Draw a diagonal line on B3 as shown in the photo. Pin the pieces together so they don't shift while you are sewing.
|
 |
Sew a scant 1/4" seam on each side of the diagonal line. (Scant means 'two threads less than')
|
 |
Cut o the drawn line.
|
 |
Press the seam towards the smaller triangle. You can see the wrong side on the left and the right side on the right.
|
 |
Place the pieces right sides together. The seams will not match up. You can see that in the photo above. Draw a diagonal line perpendicular to the seam line.
|
 |
Sew a scant 1/4" seam on each side of the drawn line.
|
 |
Cut along the drawn line.
|
 |
Make a small cut to the seam, but not through it, in the center of the seam allowance. This will make it easier to press the seam in two directions.
|
 |
In the piece on the right you can see that the seams are all pressed towards the red fabric. The piece on the left shows the right side of the fabric.
|
Time to cut the flying goose units:
 | |
|
 |
Trim around three sides.
|
 | |
|
 |
Trim the top portion off. Your finished flying goose unit is perfect!
|
 |
Do that three more times so you have four flying goose units.
|
Making the Half-square Triangles.
This is my favorite way of making half-square triangles. You can choose any method you like. You will need eight half-square triangles for this block.
 |
Stack A2 and B2 right sides together with the dark on the bottom. Place the 2" finished half-square triangle paper on top.
|
 |
Line up the fabric squares and center the paper on top. Pin in places where you won't be sewing.
|
 |
Set your stitch length to 1.5 or whatever length is smaller on your sewing machine. This will make it easier to rip the paper off later.
Sew just on the inside of the dashed lines. The directions tell you to sew right on the dashed lines, but I always have better half-square triangles when I sew a scant 1/4" seam. |
 |
Trim on the solid lines. My order of cutting is: around the outside first, horizontal lines next, diagonal lines last. You can do it in whatever order you like, but I recommend cutting around the outside first.
|
 |
Press towards the dark. Whatever way you press, it is usually easiest to press so that the paper is flat and not folded on the seam line.
After pressing I usually trim the little triangles that poke out on the edges of the seam. You don't have to, but I think it makes it easier to sew the block together at the end. Next, tear the paper off your half-square triangle blocks. |
Square in Square unit
 |
Using two B1 pieces and C, center the B1 triangles along opposite sides of the C piece. Sew a scant 1/4" seam to attach the triangles to C.
Press open with the seams towards B1 (the triangles). |
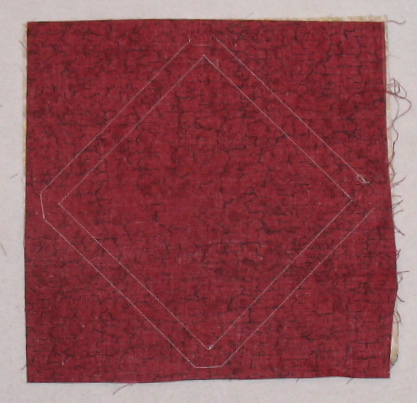
 |
Repeat the steps above and sew the other two B1 pieces to the other sides of the square. It should measure 8 1/2" square, but don't trim it. Press open and go to the next step.
|
 |
Lay all the pieces out on your flannel board (or near your sewing machine).
|
 |
Look at the photo above and see how I've sewn the side strips together. Long strips with the squares at the ends are on the left and right. Shorter strips are at the top and bottom.
Next sew the top and bottom strips to the center. Then, matching seams, sew the left and right strips to the center. |
Press your block and check the size.
Hopefully it will measure 12 1/2". If not, you can press and stretch (or shrink) it to fit.
There are only two things that can go wrong if your block isn't the right size. It is either the cutting (you aren't accurate enough in your cutting) or the sewing (you are not sewing a scant 1/4" seam).
If you have any questions, please feel free to leave a comment below. I'll do my best to answer!