This is the method that Liz will be teaching for the January Block, Dutchman's Puzzle.
Here is what we will be sewing today:
If you click on this link from Patchpieces (
No Waste Method for Making Flying Geese Units) you will open a PDF with great step-by-step instructions including how to make the Flying Geese units in any size. You can also find the instructions
here on the left side of the page.
The tutorial will make four Flying Geese units that are 3" x 6" finished ( 3 1/2" x 61/2" unifinished).
 |
Cut one 7 1/4" square (this is your 'goose' or center triangle)
and four 4" squares (background fabric) |
 |
| Draw a line diagonally on the wrong side of the background fabric. |
 |
| Place two background squares on opposite corners of the 7" square (goose), matching the corners and the diagonal lines. Pin the square in place so they don't shift while you are sewing. I usually put two pins in each background square. |
 |
| Sew a scant 1/4" seam on either side of the pencil line across both background squares. |
 |
| Cut along the drawn line. |
 |
| Press open towards the small (background) squares (which are triangles after cutting). The bottom unit in the photo shows how it looks from the right side, the top unit in the photo shows what it looks like from the back with the seam pressed towards the background fabric. |
 |
| Place the other two background squares on the pressed blocks. Match the corner of the background square with the corner of the dark (goose) square with the diagonal line going from the corner through the "V" made by the sewn background squares. (Just see the photo! It's probably more clear than me explaining it!) Pin in place. |
 |
| Sew a scant 1/4" seam on both sides of the drawn diagonal line. If everything is perfect, then your stitching line will come out of the little "V" between the background squares. |
 |
| If you look closely you can see the white stitching 1/4" on both sides of the pencil line. The stitching ends close to the "V" formed by the two pieces of background fabrics. (see the arrows). No, mine isn't perfect! |
 |
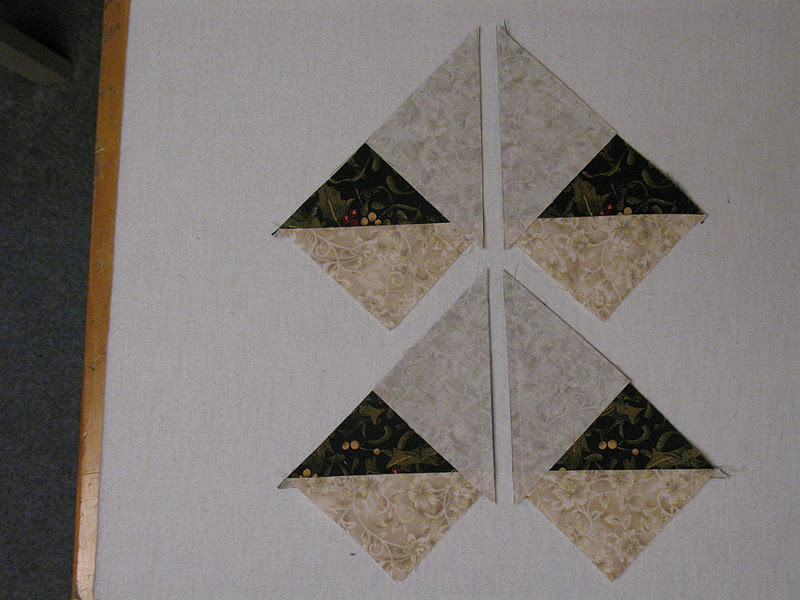
| Cut along the drawn line on both units. |
 |
| Press open. Voila! Four Flying Geese units ready to trim! |
 |
| Notice where the red arrow is pointing. For this a 3 1/2" x 6 1/2" Flying Geese unit place the center point is on the 3 1/4" mark on your ruler. The 3 1/4" point should also be 1/4" away from the edge of the ruler so that when you trim you have a 1/4" seam allowance. |
 |
| This is how the ruler and the Flying Geese unit looks before trimming. I have a 6 1/2" ruler so I can trim the three sides that are showing. Next flip the Flying Geese unit 180˚. Line the previously cut edge up on the 3 1/2" line and trim the remaining side. |
 |
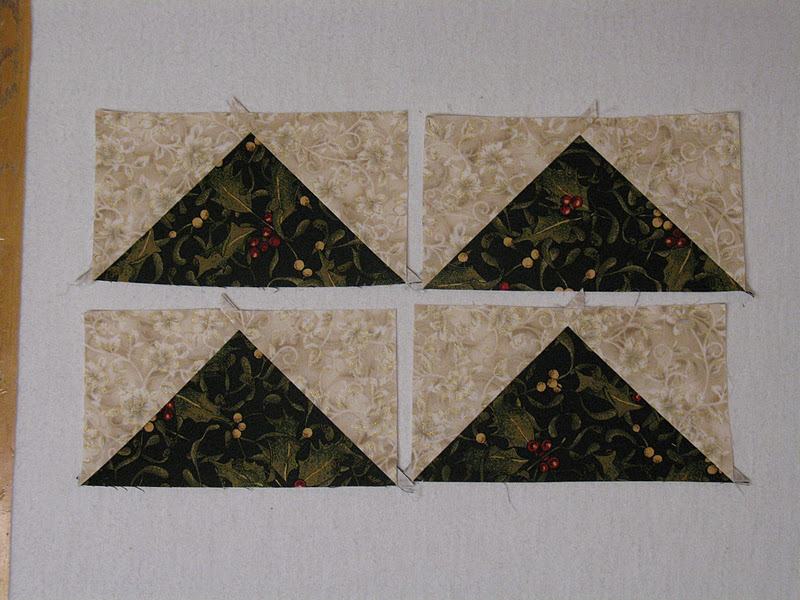
| Four Flying Geese units ready to sew into your block. |
The Flying Dutchman block uses eight Flying Geese units. In the next post I'll use Method 2 (the Quilt in a Day method) for making Flying Geese.


I love this block
ReplyDeleteThanks! Me too! I'm glad Liz chose to do it :)
ReplyDelete